Guide: Updating Instance Type on AWS EKS


In this guide, we'll walk through an EKS node group update and highlight a few things to look out for when updating an existing cluster.
Motivation
Change can be scary - especially when it comes to infrastructure. That said, there are multiple scenarios where it makes sense to update the instance type of some or all nodes on a Kubernetes cluster. Perhaps you want to use larger machines to grant more computing resources to individual pods, or maybe you want to attach GPUs to certain nodes to support ML workloads. Maybe it's the year 2050 and you want to upgrade to the latest t72.medium instances being promoted by AWS.
Regardless, changing the instance type of an EKS node group always follows the same general process. In this guide, we'll walk through a basic example and highlight a few things to look out for when updating an existing cluster.
Prerequisites
This guide assumes you have an EKS cluster with autoscaling enabled. The node group for your cluster should also be self-managed, meaning you can view and update the EC2 instances and auto scaling group(s) attached to your cluster. Note that if you provisioned your cluster through Porter this is automatically the case.
Step 1: Create a new launch configuration
In this example, we'll upgrade a group of EKS worker nodes from t3.medium to t3.xlarge instances. To start, we can see from the Porter dashboard (or AWS console) that our EKS cluster has three t3.medium instances for user workloads and two t2.medium instances for Kubernetes system components:
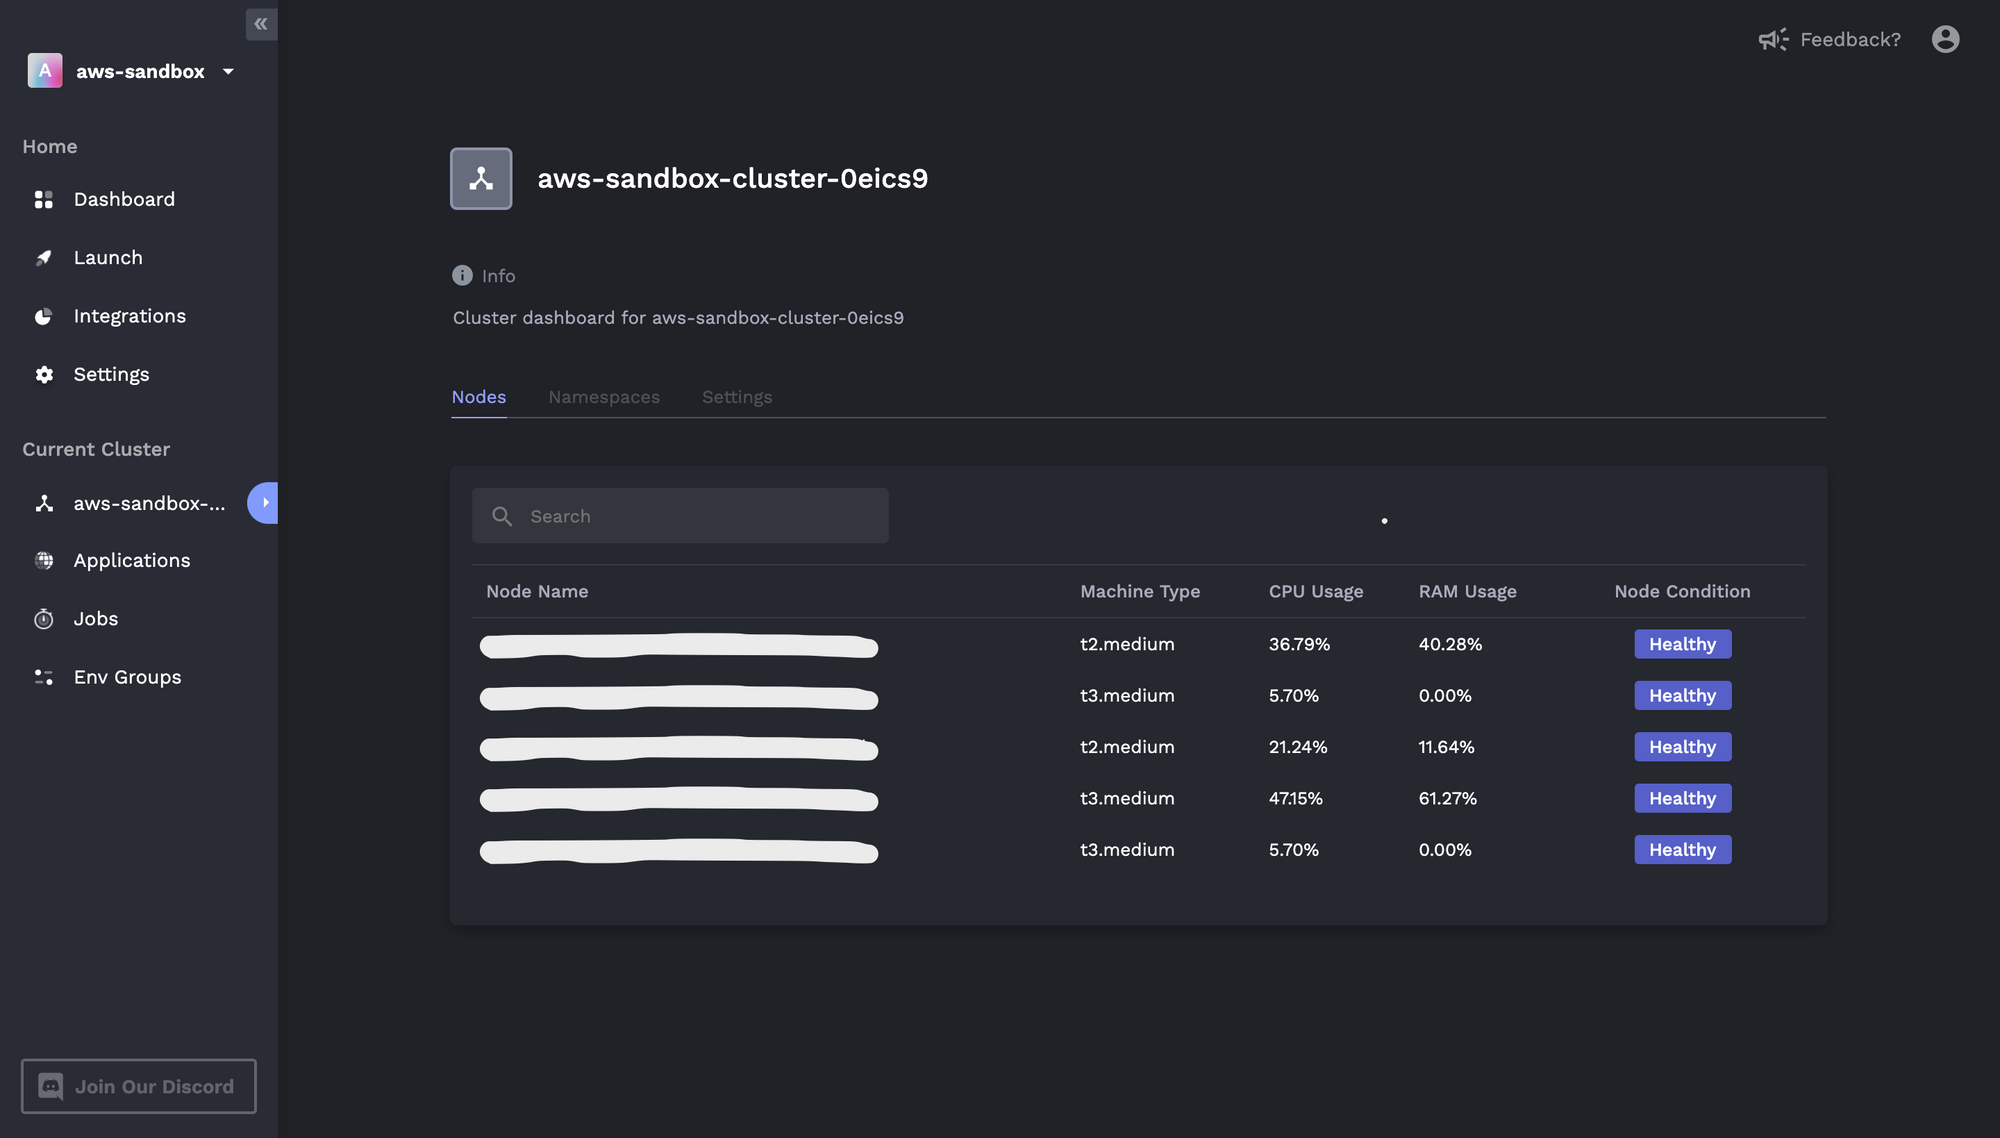
Note that you might have one (or more than two) node groups depending on how you initially configured your cluster. If you created an EKS cluster using Porter, your cluster will also have two node groups by default.
The first step is to update the launch template/configuration of our auto scaling group. When the EKS cluster scales out, the auto scaling group uses a launch config to decide what kind of instance to add and how it should be configured. We can view the current launch config of our auto scaling group under EC2 -> Auto Scaling groups:
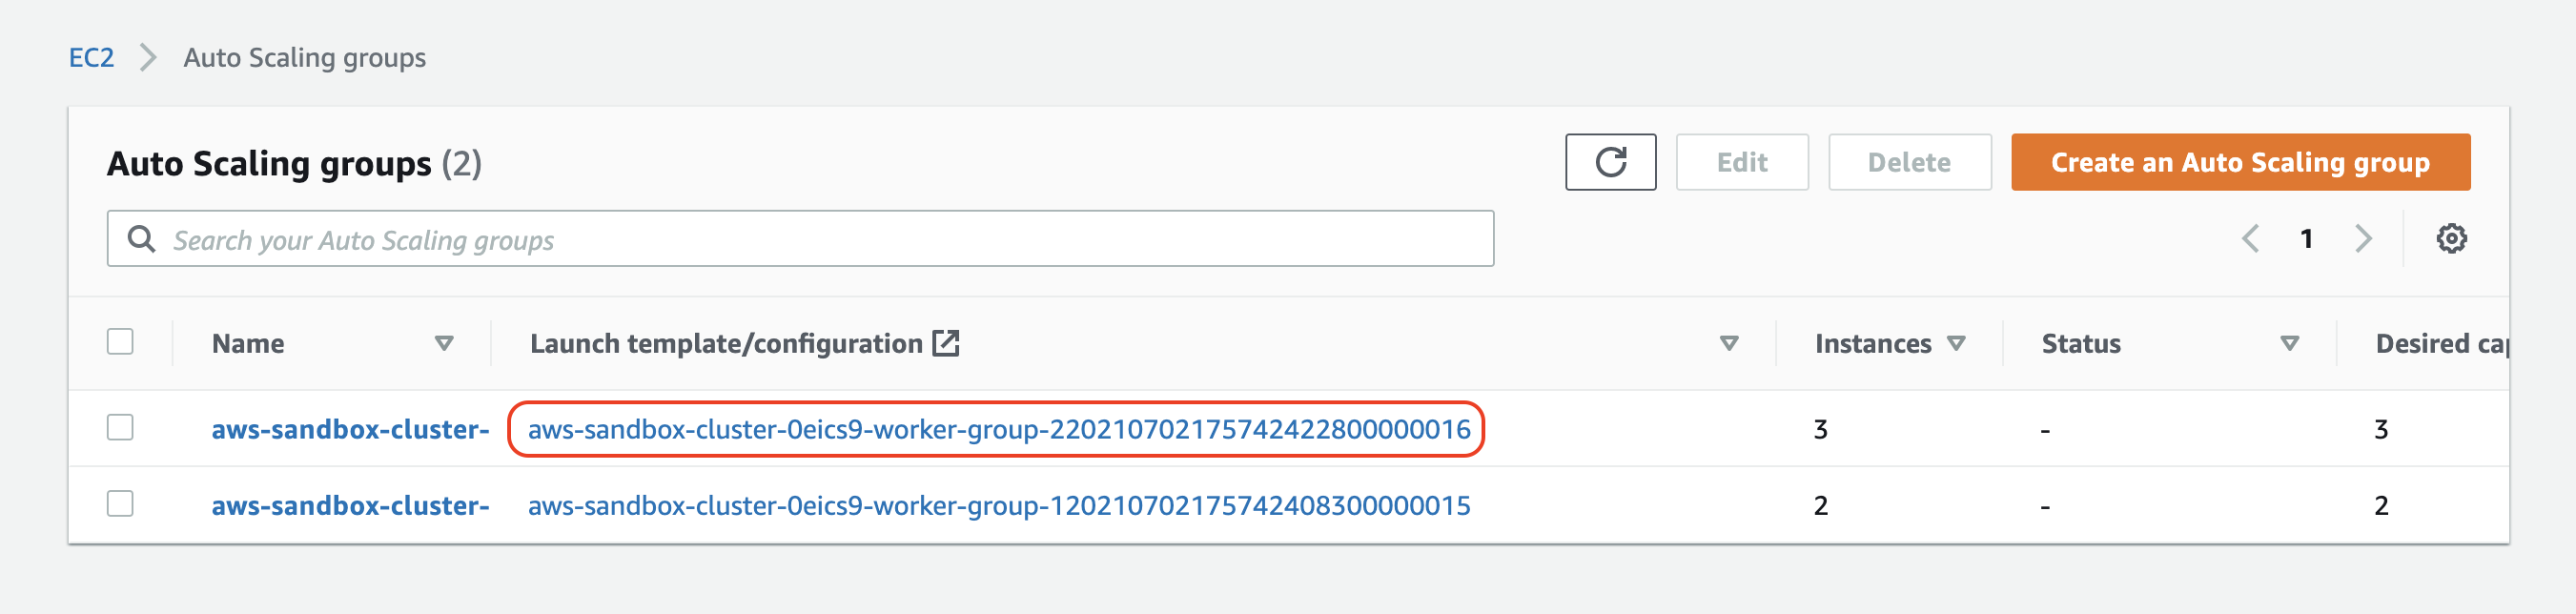
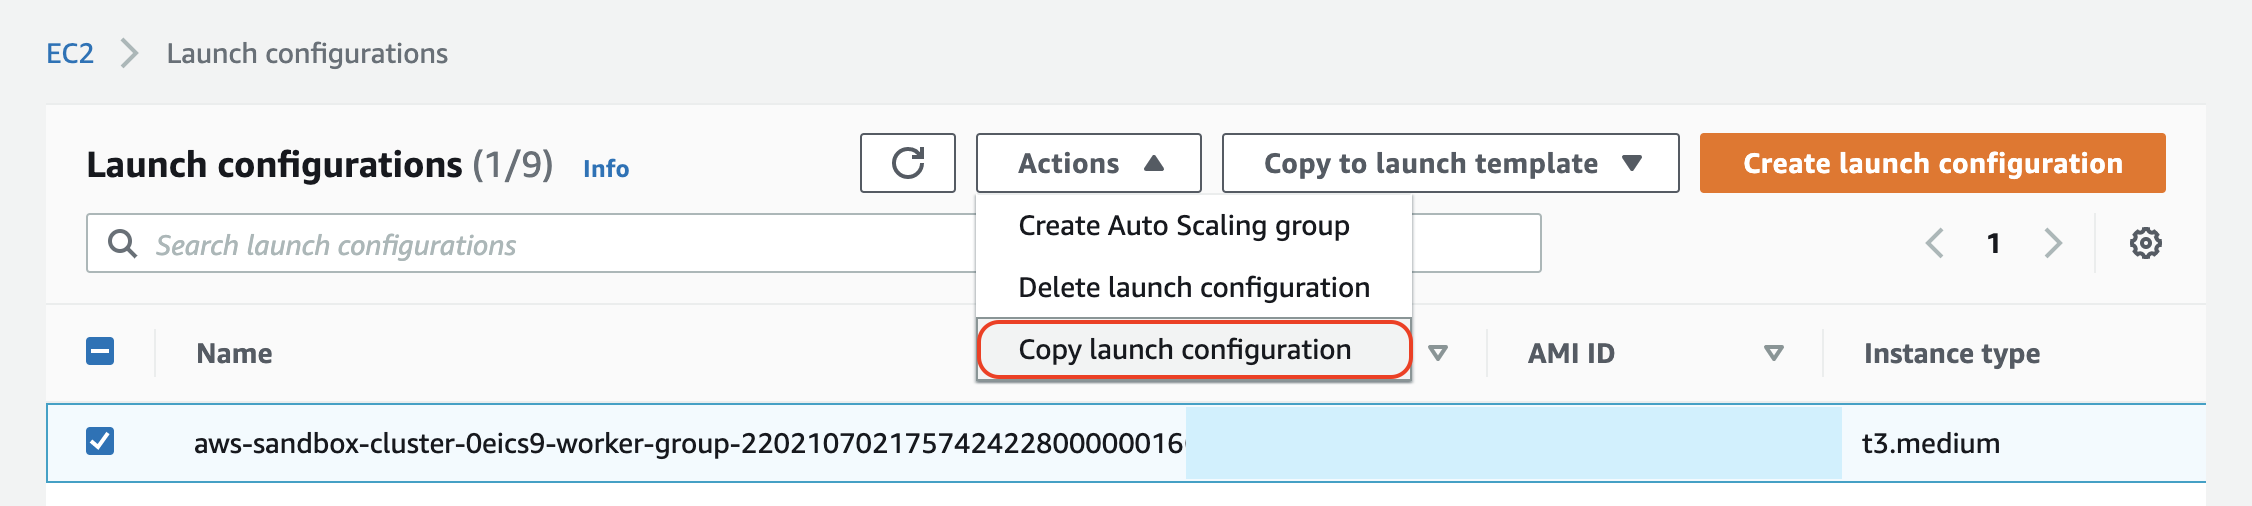
We'll select the launch config of the worker group with three instances and proceed by selecting Actions -> Copy launch configuration:
From this view, we can name our new launch config and specify an updated instance type. For this example I've opted to use t3.xlarge instances for the updated auto scaling group:
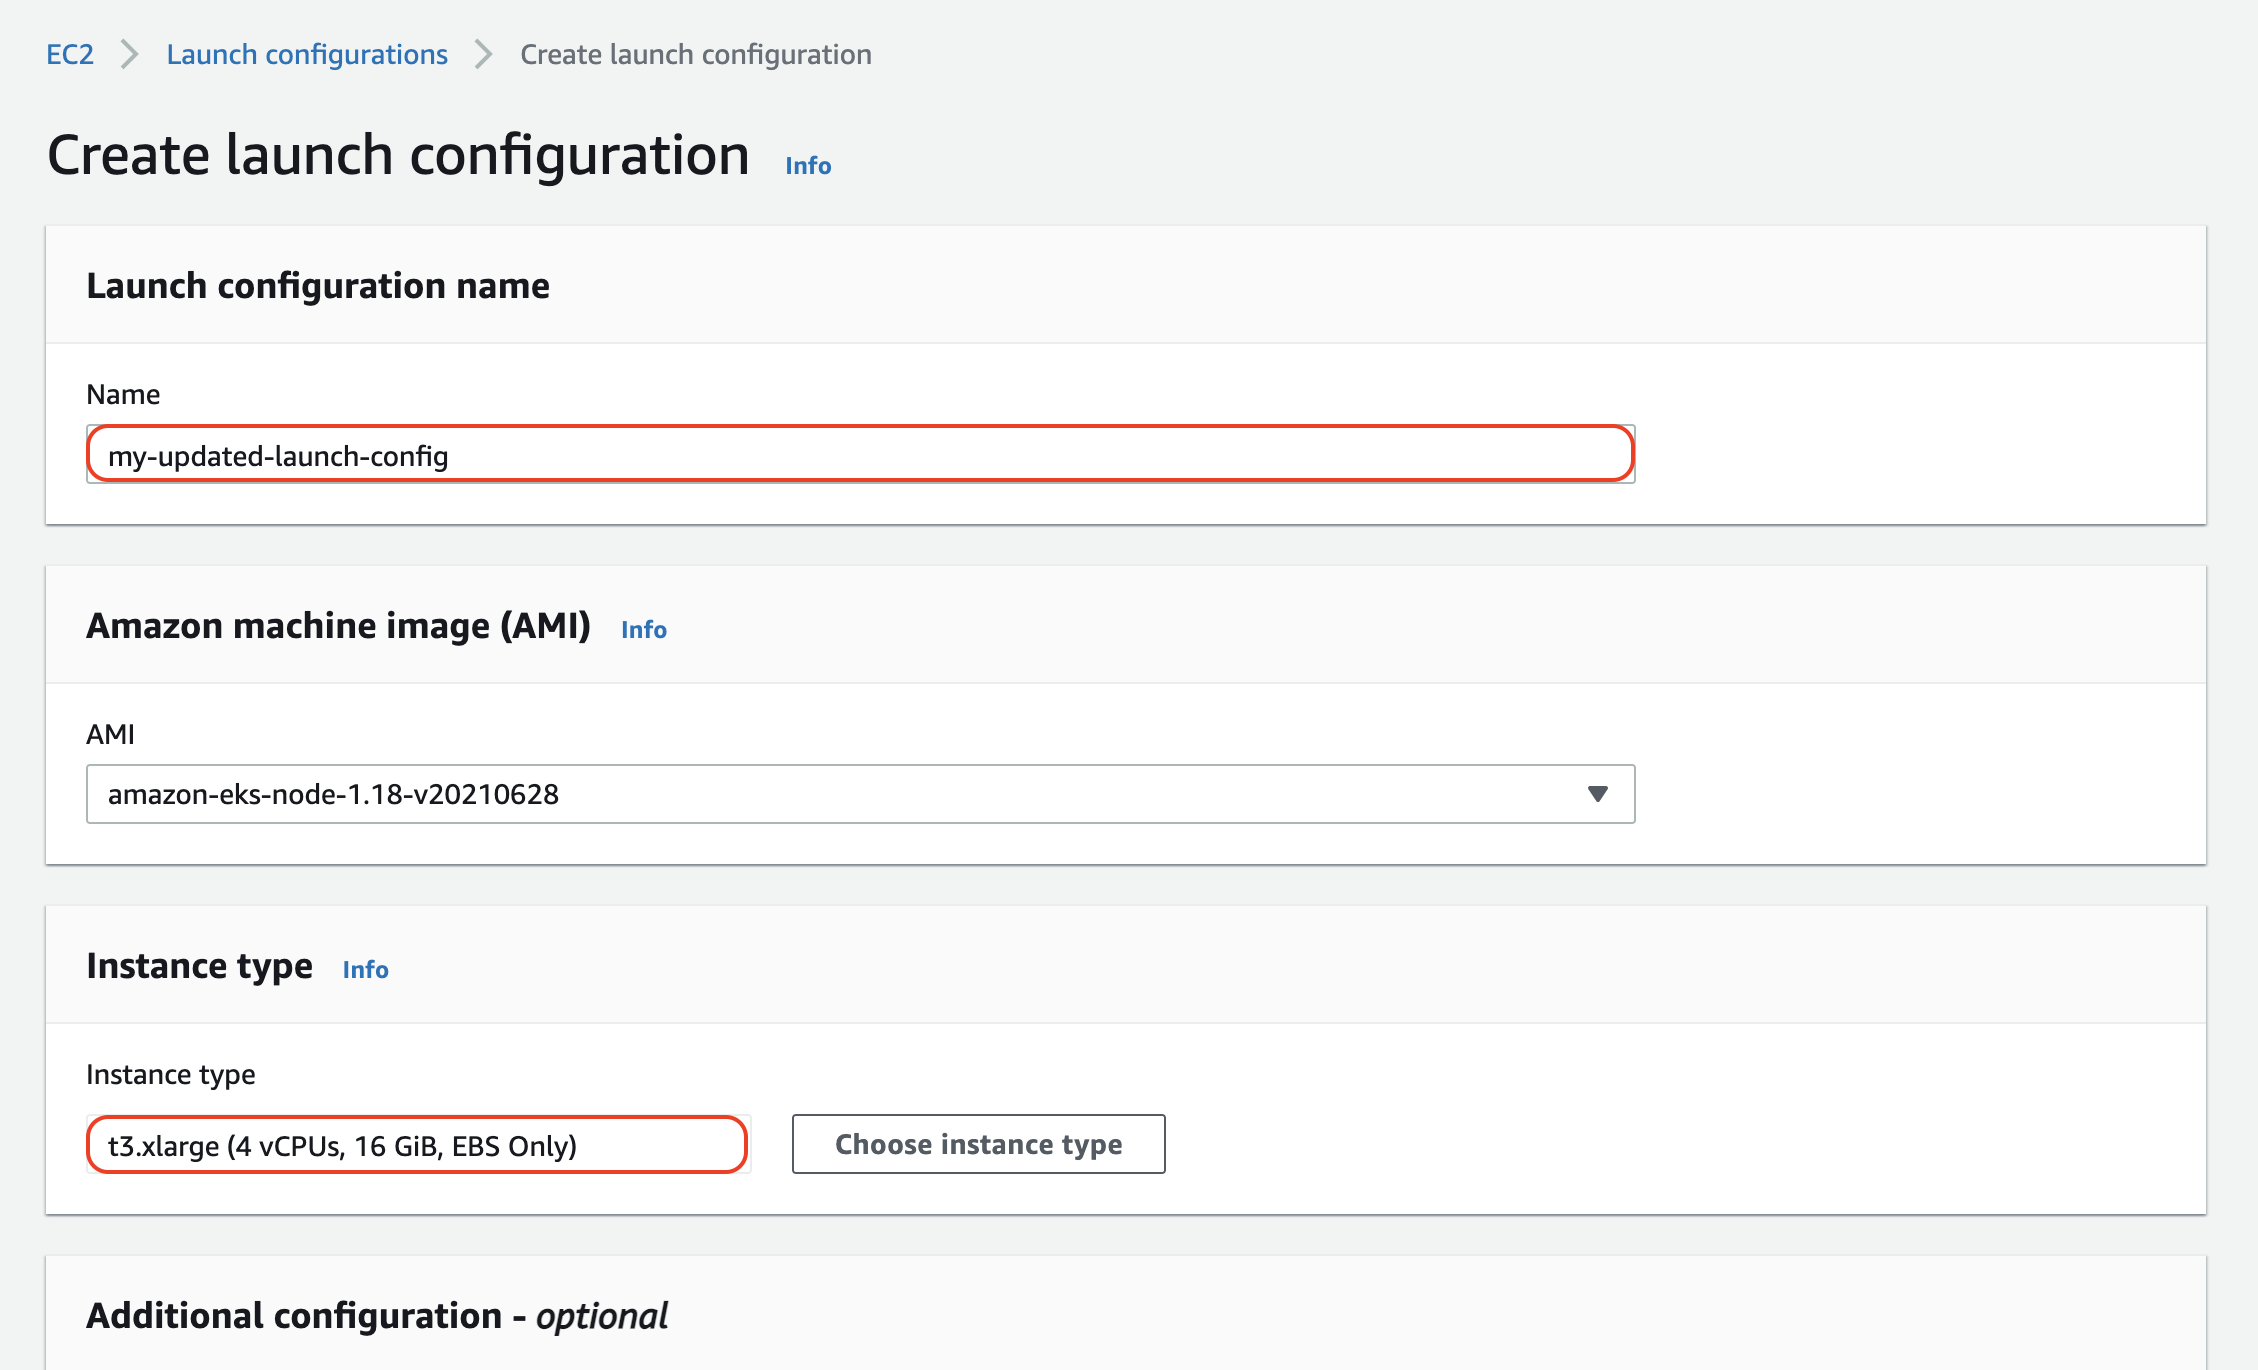
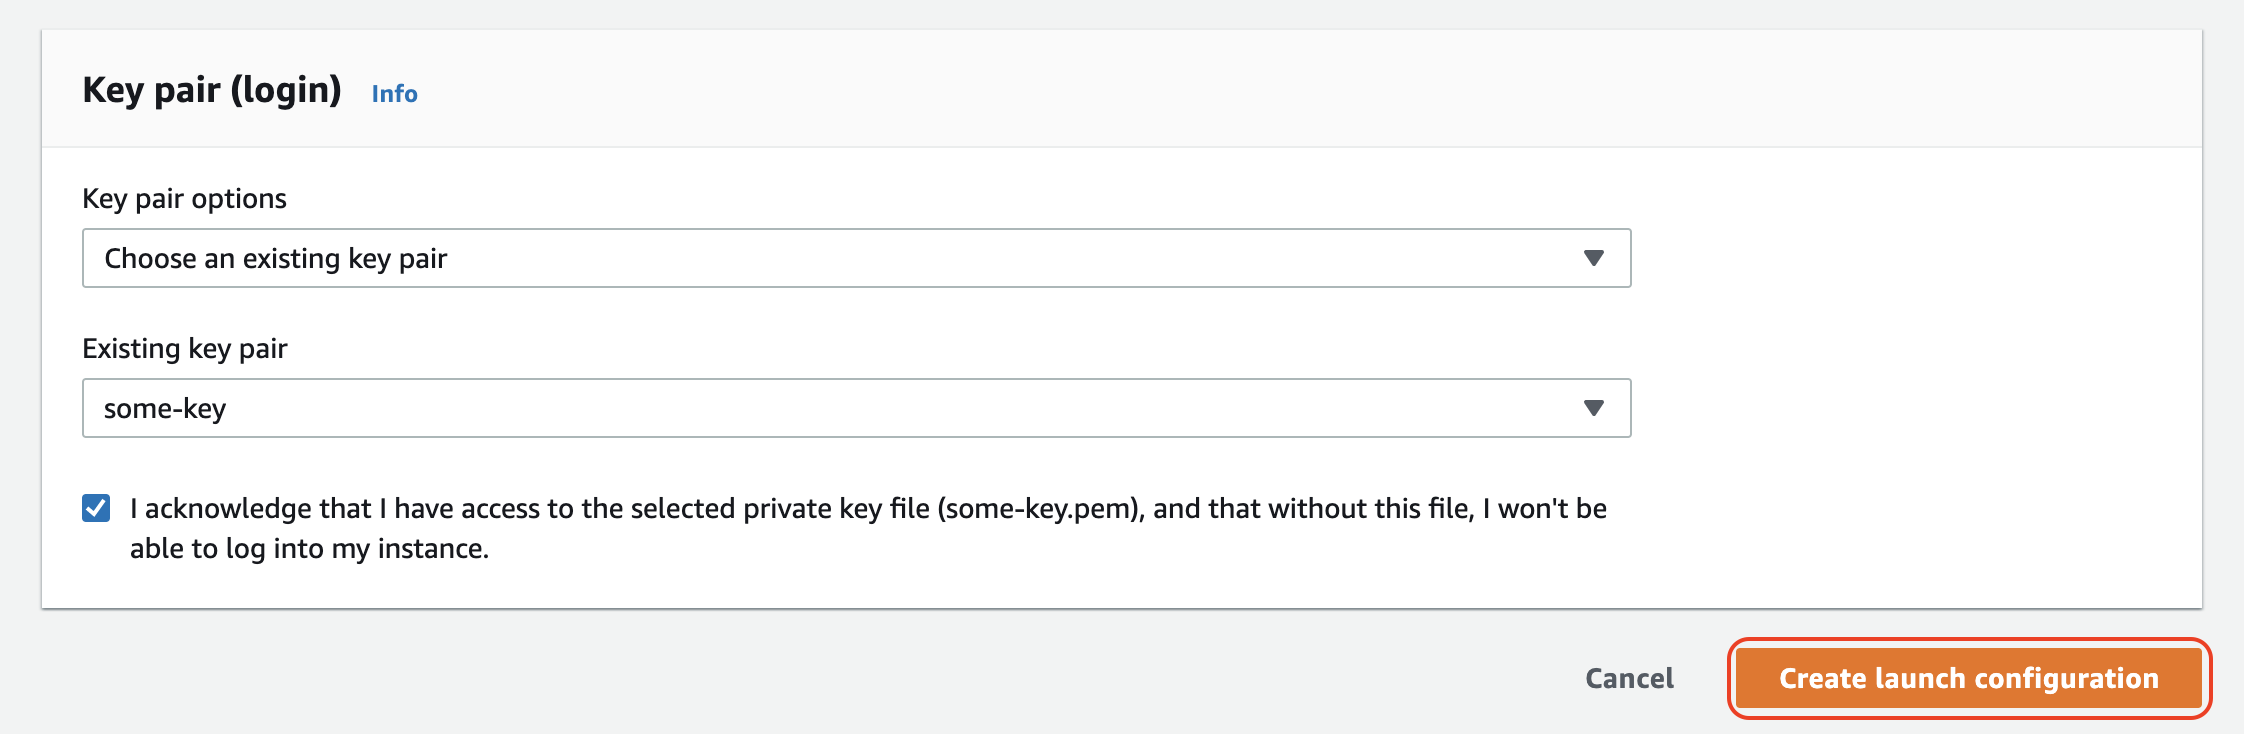
Next, we need to specify a key pair for accessing instances generated by our launch config (for example through SSH). After choosing an existing key pair (or creating a new one if needed), select Create launch configuration:
We now have an updated launch config that we can use for spinning up new instances through an autoscaling group.
Step 2: Update the autoscaling group and refresh existing instances
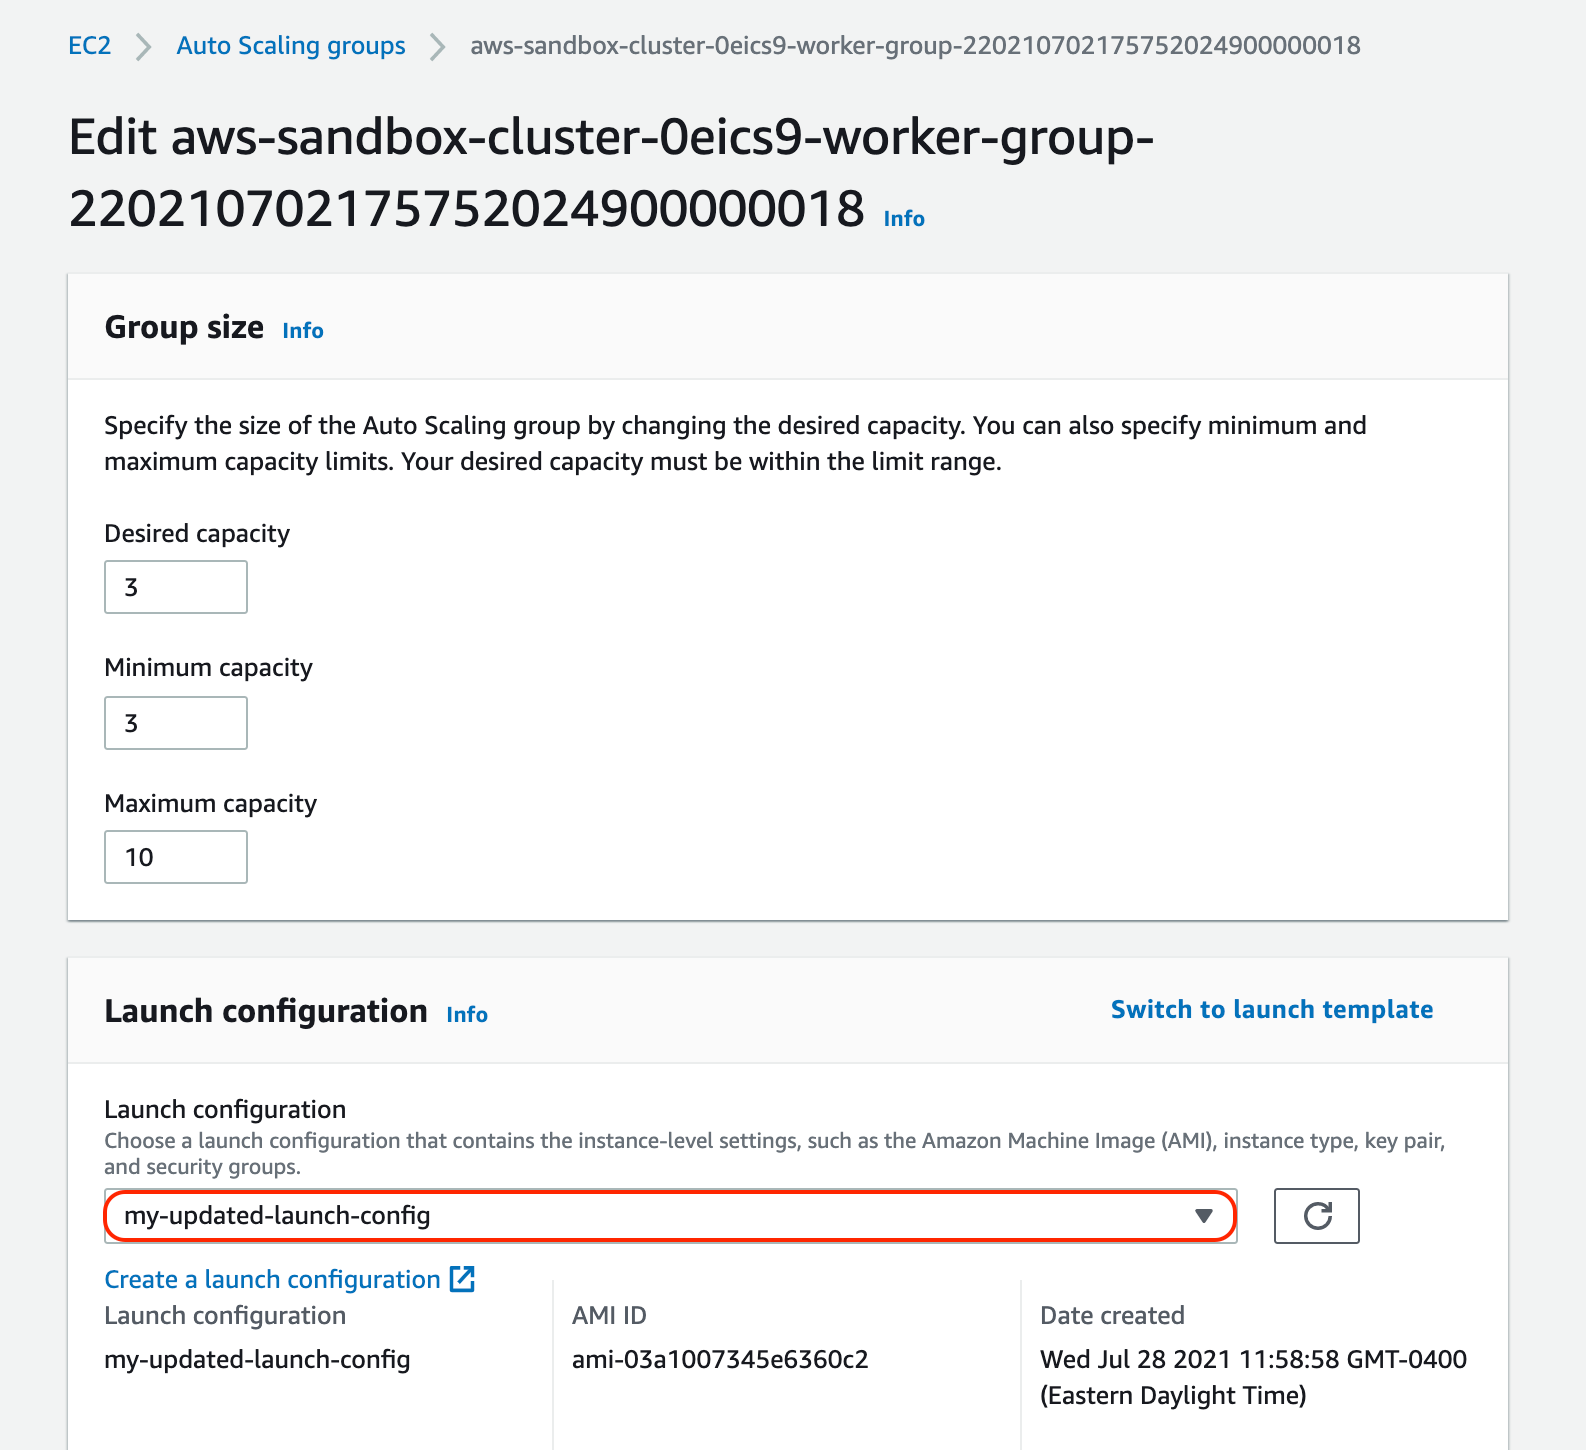
Now that we've created a new launch configuration, we need to attach it to our existing autoscaling group. Returning to EC2 -> Auto Scaling groups, find the auto scaling group to update and select Edit. From the edit screen, we can select our new launch config and choose Update:
At this point, when new worker nodes are added to our cluster, they will use the updated launch config. Unfortunately, we're not finished just yet since the existing nodes still haven't been upgraded.
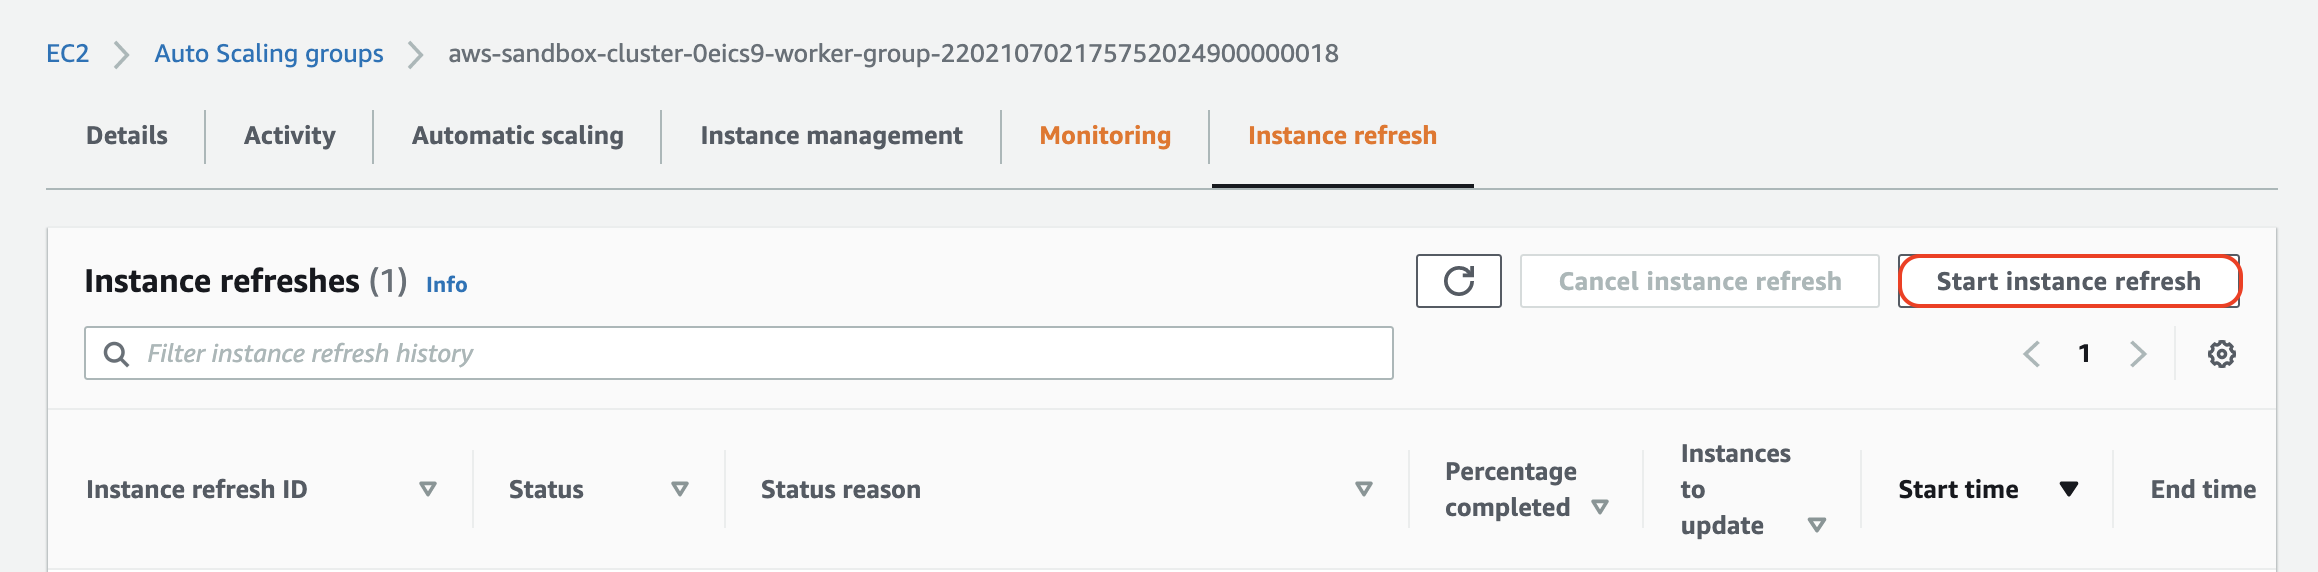
Enter EC2 instance refresh. Instance refresh allows us to trigger a rolling update across an auto scaling group while ensuring a minimum number of instances remain available throughout the update process. After selecting the same auto scaling group from before, navigate to the Instance refresh tab, and choose Start instance refresh:
Here, we're given the option to set the minimum healthy percentage (how much capacity should remain available during the refresh) as well as the warmup time for new instances:
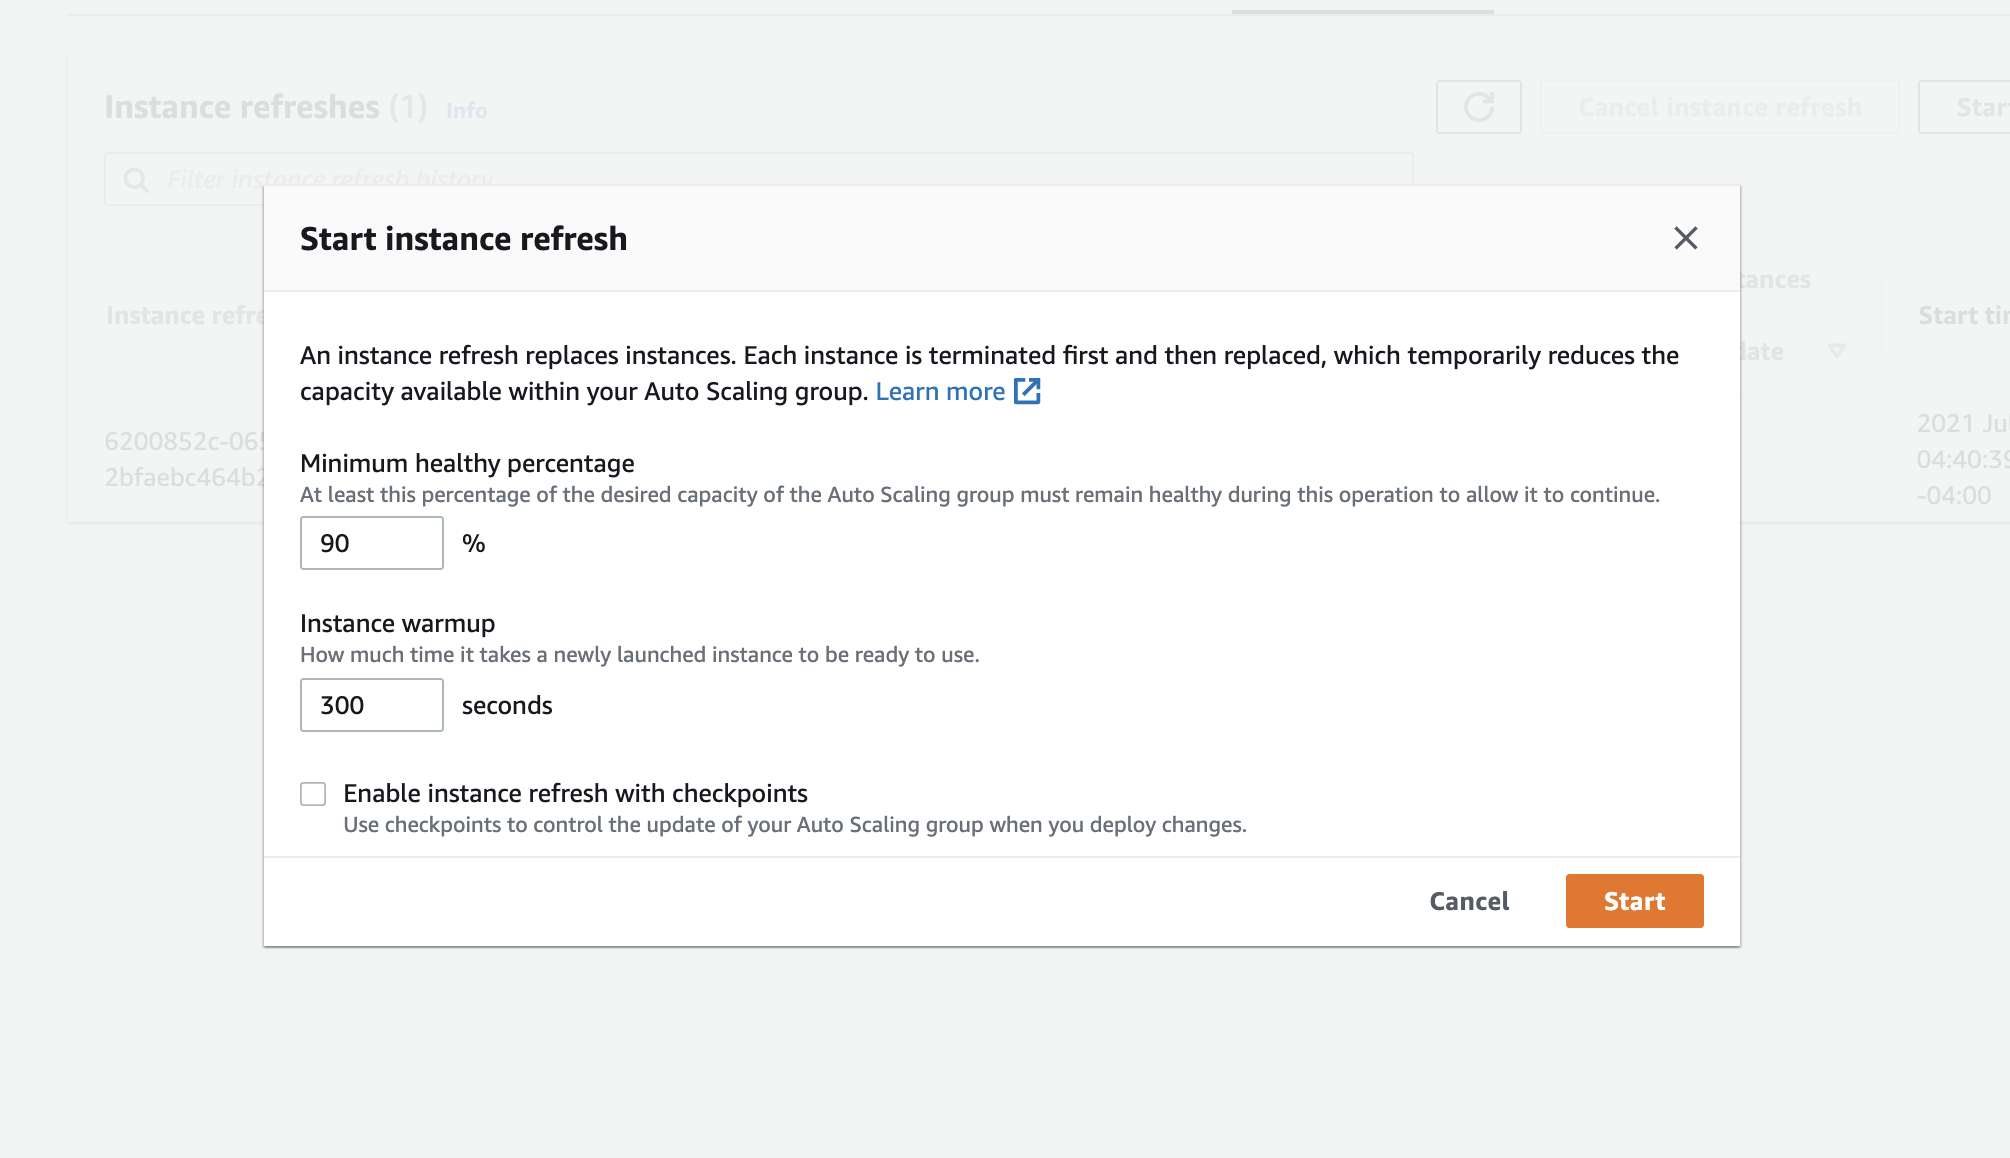
Note that at least one instance will be refreshed at a time. As the instances are being refreshed, Kubernetes will automatically reschedule workloads to the new nodes. For auto scaling groups with only one instance, it may be desirable to temporarily increase the minimum limit to ensure that workloads can be immediately scheduled.
Important note: if you need to avoid service downtime, you will have to ensure that multiple replicas of each application are running across more than one node. Even if your application has multiple replicas, Kubernetes doesn't prevent all replicas from being collocated on the same node by default. This means that if all replicas for your service are running on a single node, the service will become temporarily unavailable when the node is spun down. For more details on tolerating node failure, you can configure pod anti-affinity following this example. If your Kubernetes version is 1.19 or later, you can also use pod topology spread constraints to ensure high availability across nodes.
Once you are ready to trigger the instance refresh, choose Start. Bear in mind that instance refresh can take 5-10 minutes per node, and the total time to complete the refresh also depends on the size of the cluster.
Step 3: Verify instance update and existing workloads
After the instance refresh is completed, we can check our cluster to verify that the worker group has updated:

As we can see, the three worker nodes are now running as t3.xlarge instances. Finally, to confirm that our workloads were successfully rescheduled, we can check the status of our existing applications from the Porter dashboard:

Looks like everything is running successfully on our updated nodes! If you have multiple auto scaling groups that you would like to update, you can simply repeat this process as needed.
Porter is an open source PaaS that helps teams automate DevOps in their own cloud.
More Blog Posts


Subscribe to our newsletter
