Guide: Setting up a Tailscale VPN on Kubernetes


Deploy Tailscale to Kubernetes via Helm or Porter to securely access k8s services by cluster IP.
What is Tailscale
Tailscale is a VPN that creates a secure network between your servers, computers, and cloud instances. Unlike many other VPNs, setting up a new network on Tailscale requires minimal user configuration and virtually no experience with networking. To learn more about how Tailscale works under the hood, you can check out this excellent overview on their official blog.
Using a VPN with Kubernetes
There are many cases where we want to connect to a service running on a Kubernetes (k8s) cluster from a local machine without publicly exposing the service to external traffic. We may, for instance, want to securely connect from our browser to an internal monitoring or analytics dashboard (e.g., Metabase, Grafana, or the native k8s dashboard). Another use case is if we want to reach certain development or staging services on the cluster without opening them up to public access (either from the browser or the CLI).
There are a few basic options at our disposal for achieving this:
Naturally, each of these options has its own set of tradeoffs, but a full breakdown of all the pros and cons deserves a dedicated article. In general though, setting up a VPN is an attractive option if any of the following are true:
If using a VPN with Kubernetes seems appropriate for your use case, there's just one remaining thing to decide...
Subnet Router vs. Sidecar
Typically, for each device we connect to our Tailscale VPN, we have to download a client and register each machine with the VPN's coordination server.
For applications running on a Kubernetes cluster, we can naively replicate this setup by adding a Tailscale sidecar container to each pod we want to reach over the VPN.
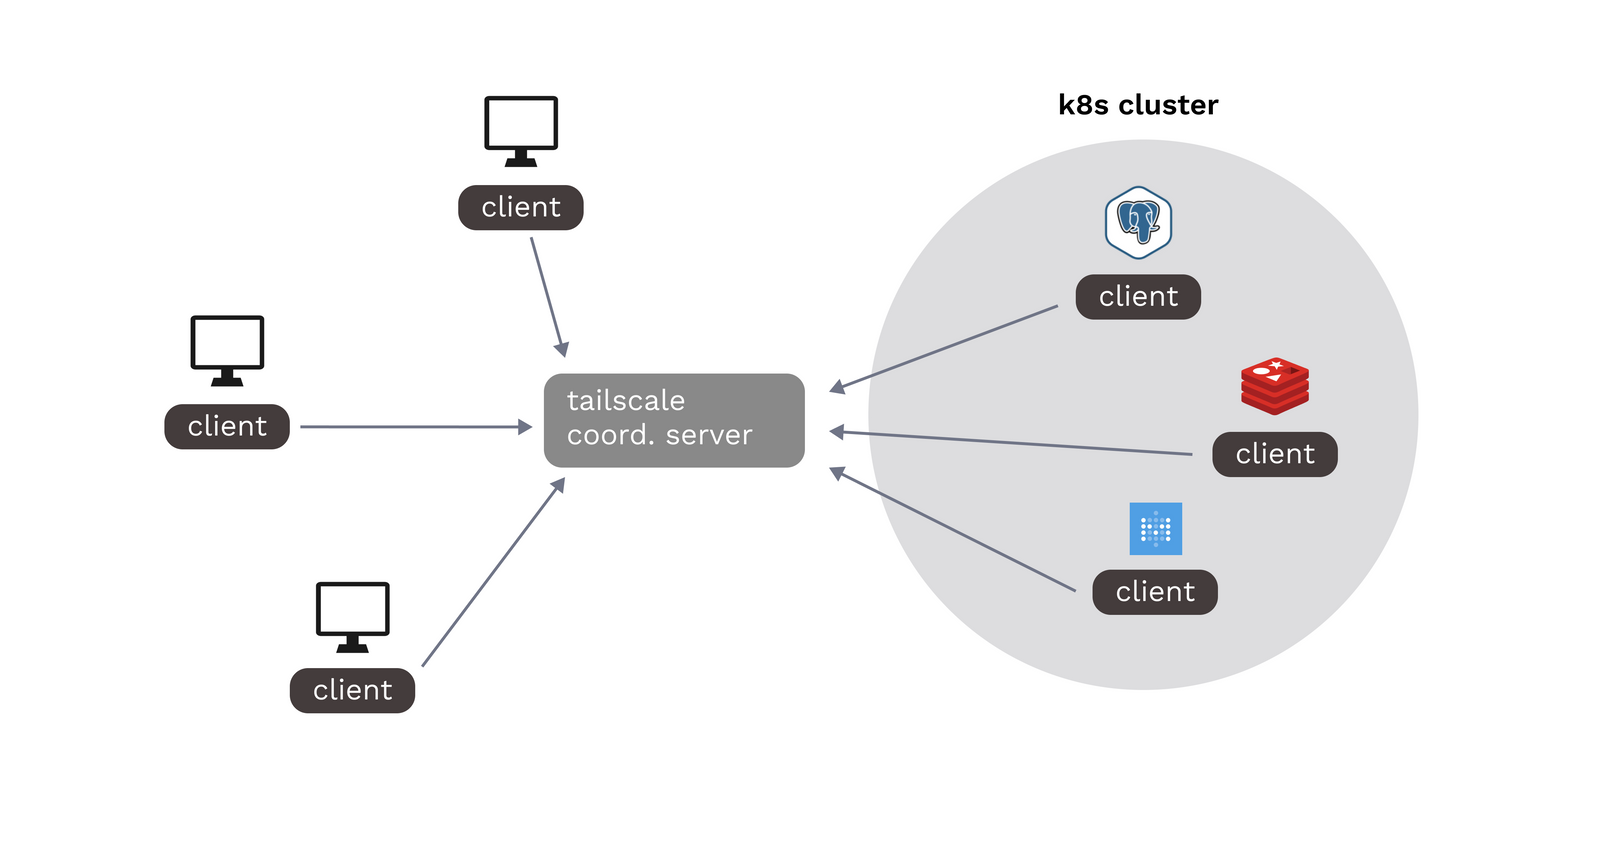
Note, however, that this method requires all pods to maintain their own instance of the Tailscale client, and any existing workloads will require config changes in order to be added to the VPN.
For the purposes of this guide, we will use a different method that introduces significantly less overhead: deploying Tailscale as a subnet router (formerly referred to as a "relay node").
As the name suggests, a subnet router advertises an entire subnet to the Tailscale VPN, allowing a connected user to access any internal cluster IP within a specified range (or set of ranges).
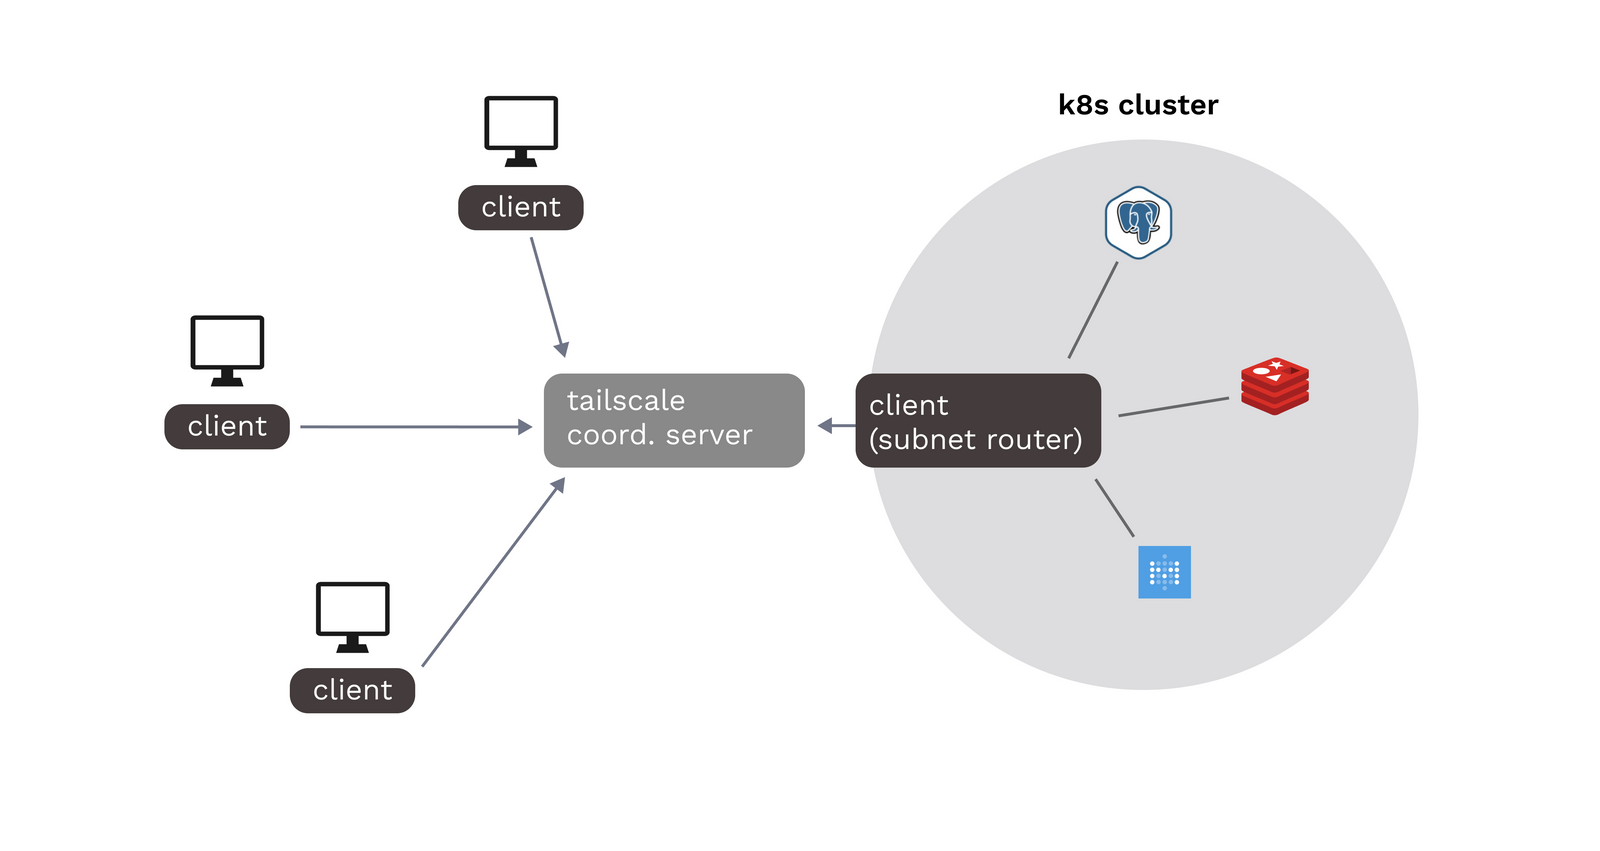
A major benefit of deploying Tailscale as a subnet router is that we don't need to make configuration changes to existing or future services in order to connect them to Tailscale. Any service with an internal cluster IP in the declared range can automatically be reached through the VPN.
Of course, subnet routing may not be appropriate for all use cases. For instance, we may want additional safeguards to ensure that certain cluster IPs aren't reachable through the VPN even if the Tailscale client is configured to only expose a certain set of IP ranges. For a more in-depth exploration of using subnet routers with Tailscale and the resulting tradeoffs, you should refer to the official docs.
Method #1: Helm CLI
Now that we've covered the basics, let's actually deploy Tailscale to a Kubernetes cluster using the Helm CLI. For instructions on deploying Tailscale through Porter, see Method #2 below. Here's a quick rundown of the prerequisites:
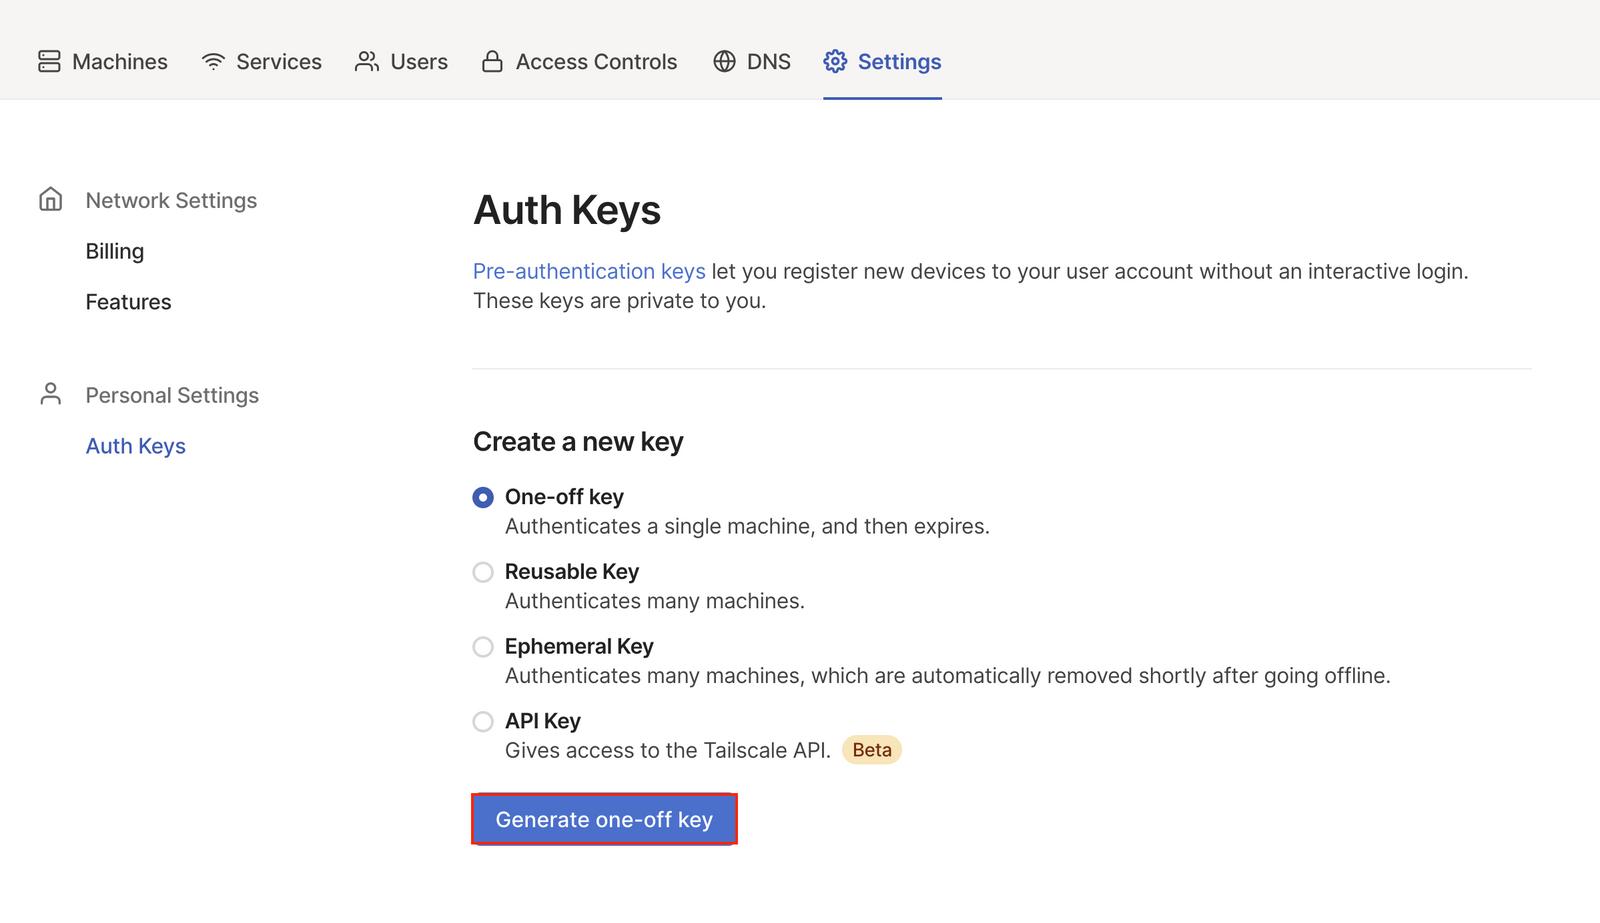
(1) First, we'll need to generate an auth key from the Tailscale admin panel. Under Settings ->Auth Keys we should see a Generate one-off key option:
(2) Next, we need to figure out what subnet IP range to expose for our k8s cluster. Unfortunately, native support for directly retrieving the service range CIDR is basically nonexistent (here's an open GitHub issue on the subject at the time of writing this). For users on Kubernetes 1.18+, we can use the following workaround:
This command attempts to create an invalid service and parses the error to retrieve the service range CIDR.
(3) Now that we have our auth key and subnet range, we are ready to deploy Tailscale to the cluster as a Helm chart. There is currently no officially supported Helm chart for Tailscale, but we can use mvisonneau's community chart to deploy the subnet router.
First, we need to add the Helm repo:
And then we can install the chart using our auth key and subnet range:
After deploying, we should see the following output from the Helm CLI:
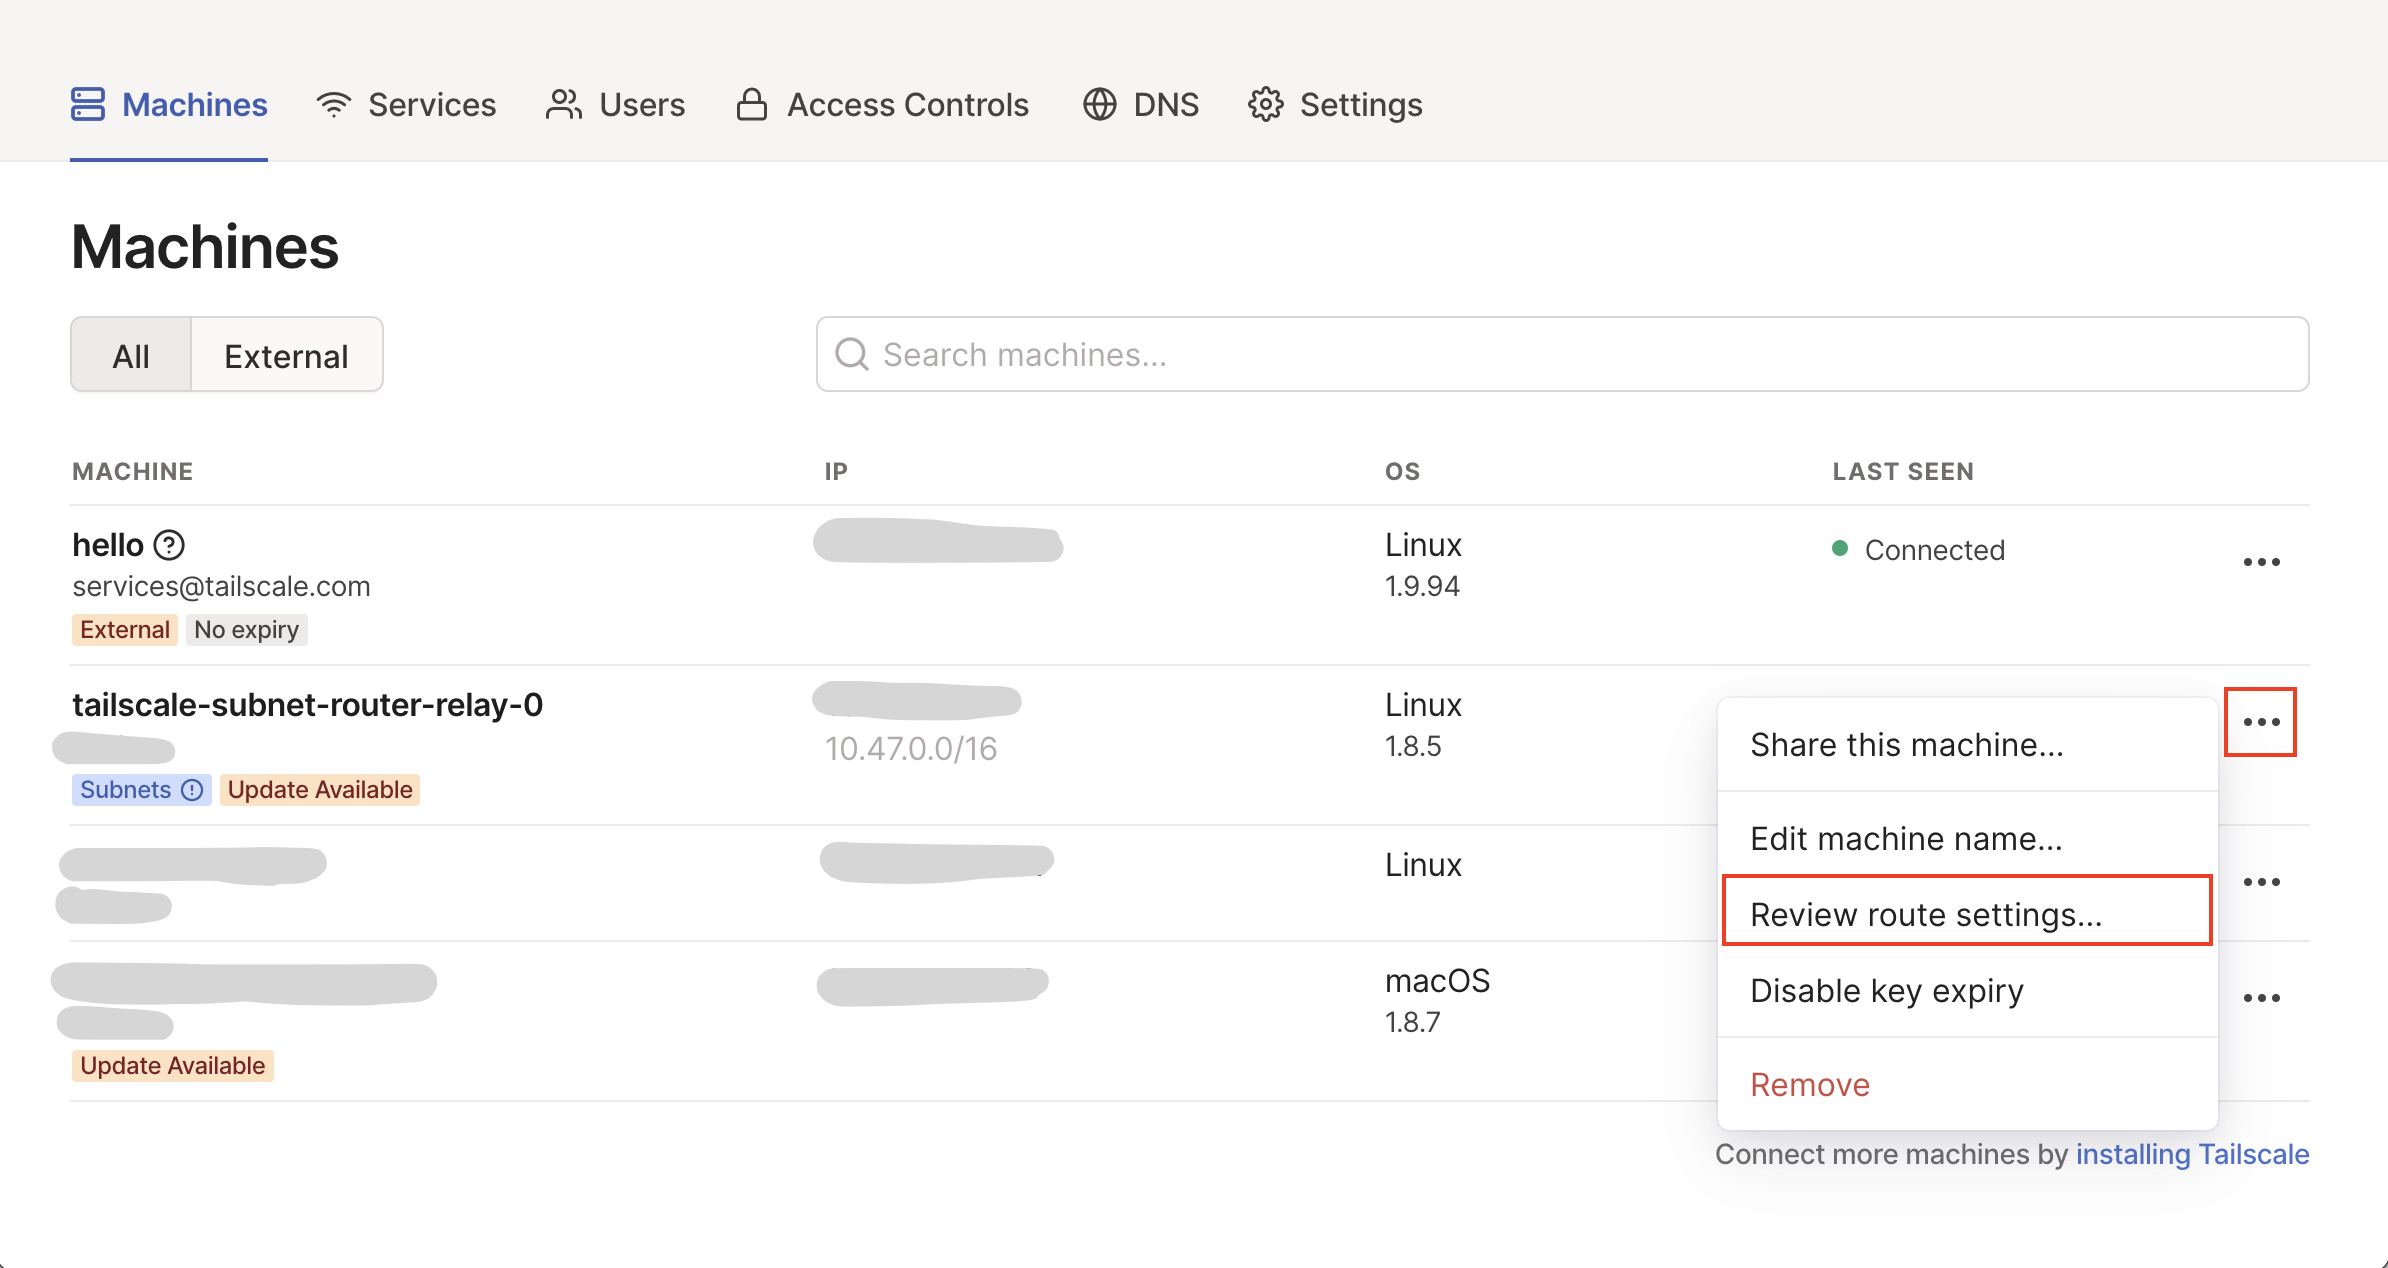
(4) For the final step, we just need to approve our newly advertised subnet routes from the Tailscale admin panel. Under the Machines tab you should see your newly registered subnet router and a grayed out subnet range. From the machine settings navigate to Review route settings:
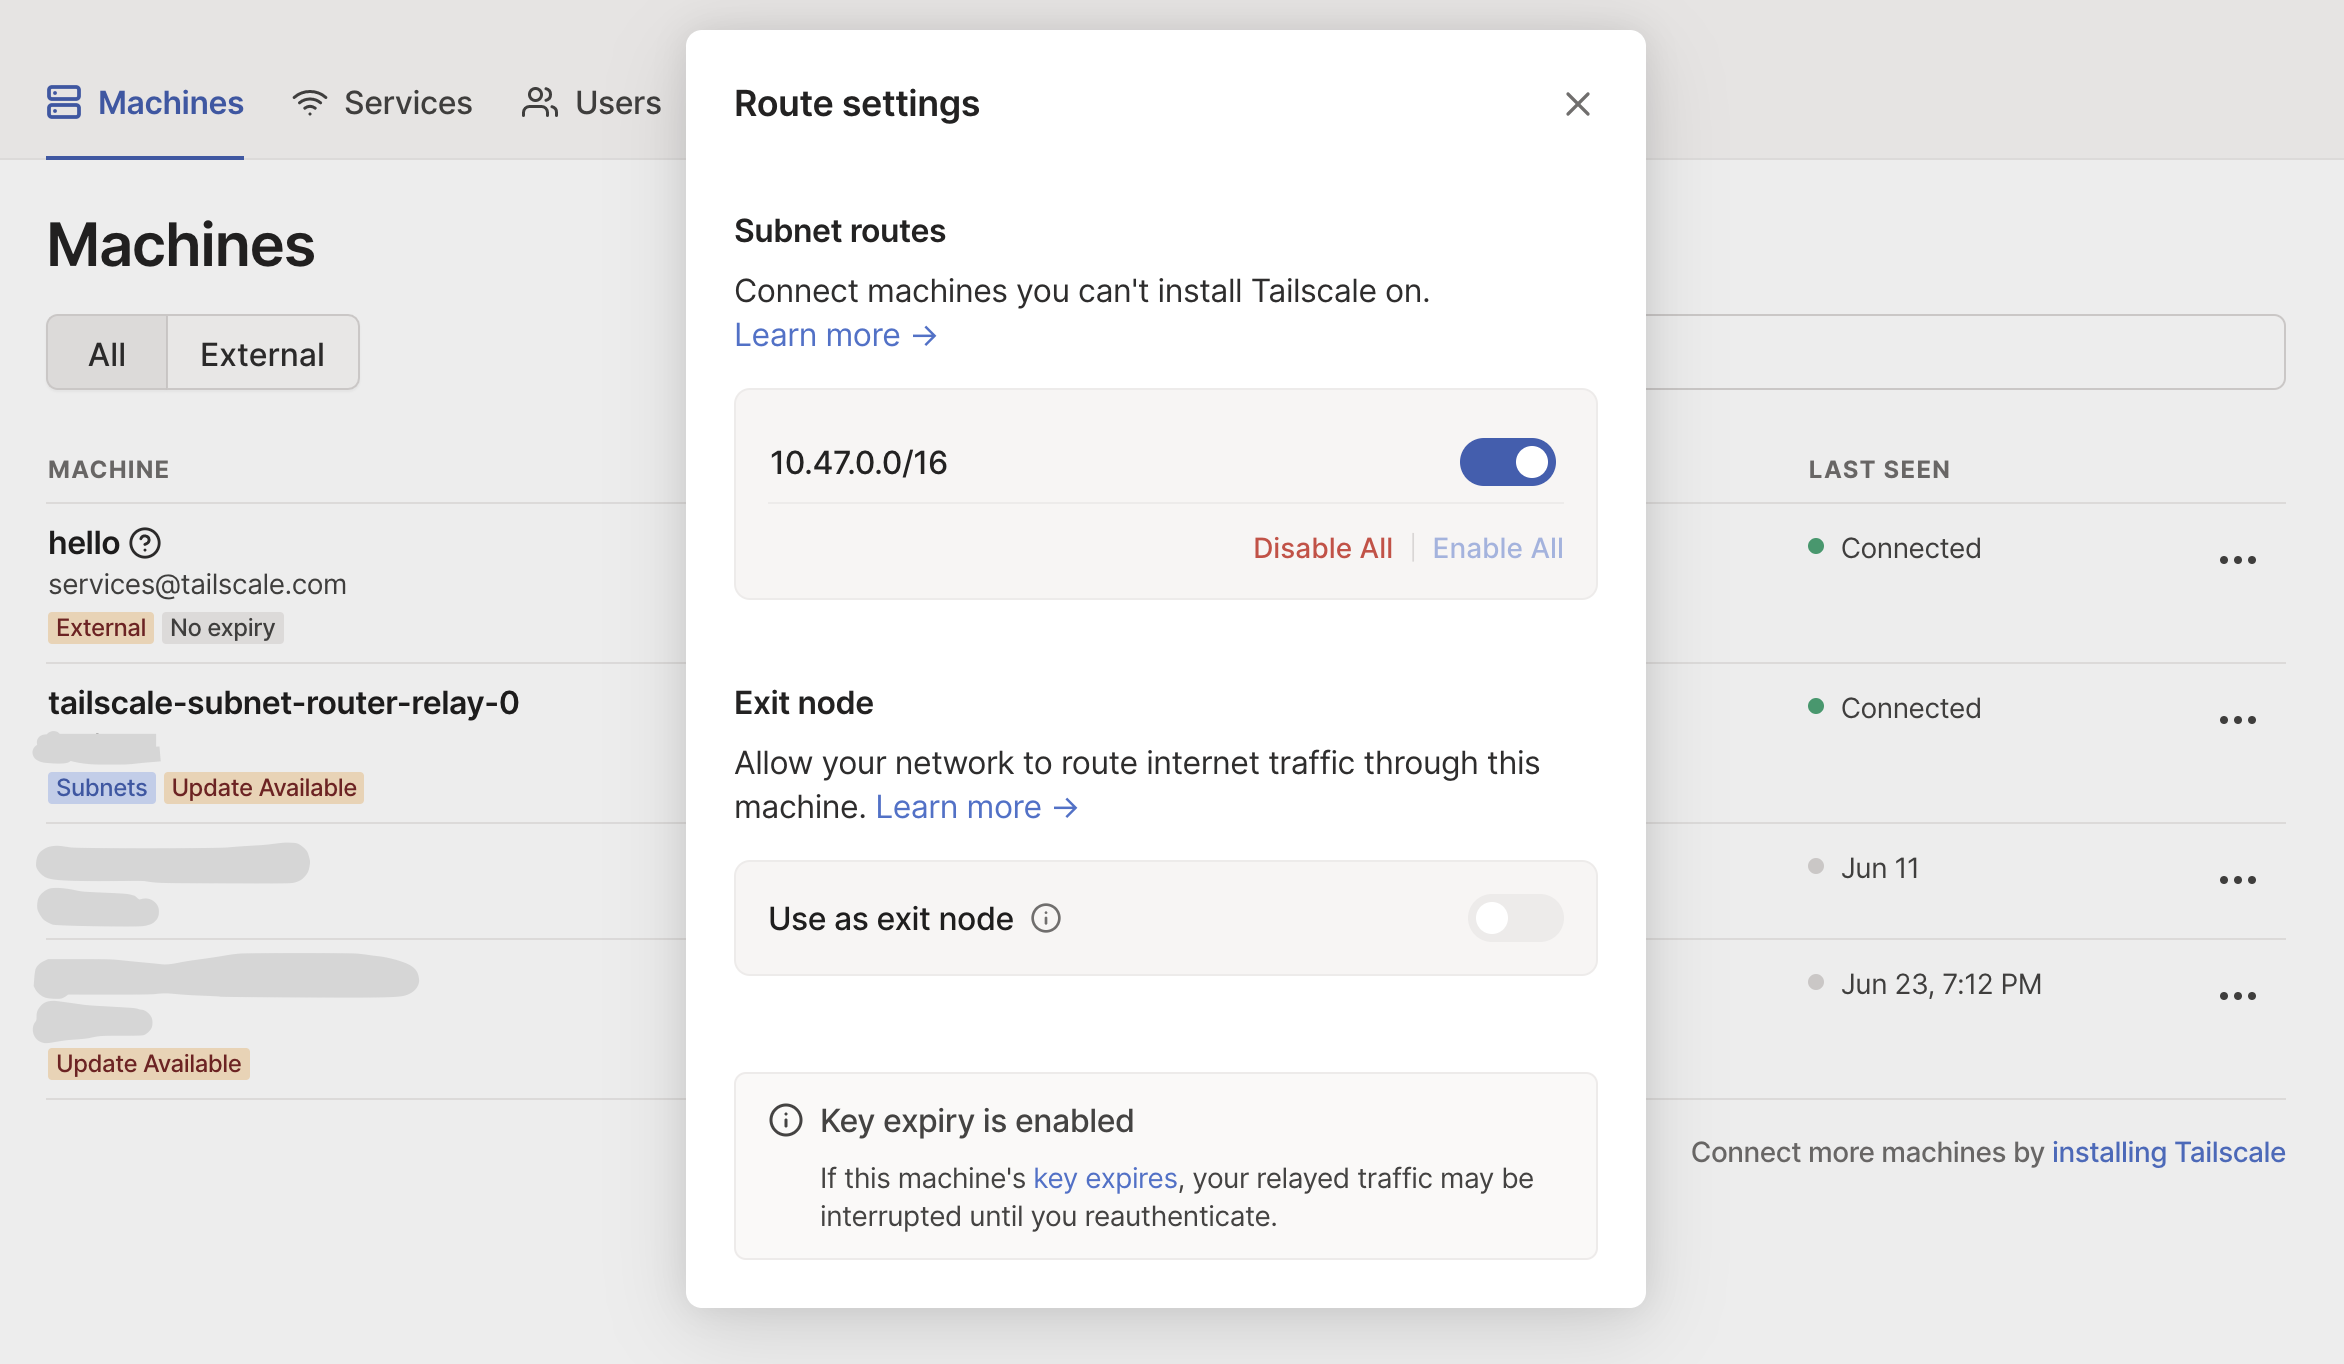
And then simply approve the displayed subnet routes:
That's it! Our subnet router is now deployed to the cluster and connected to the Tailscale VPN.
Method #2: Deploy from Porter
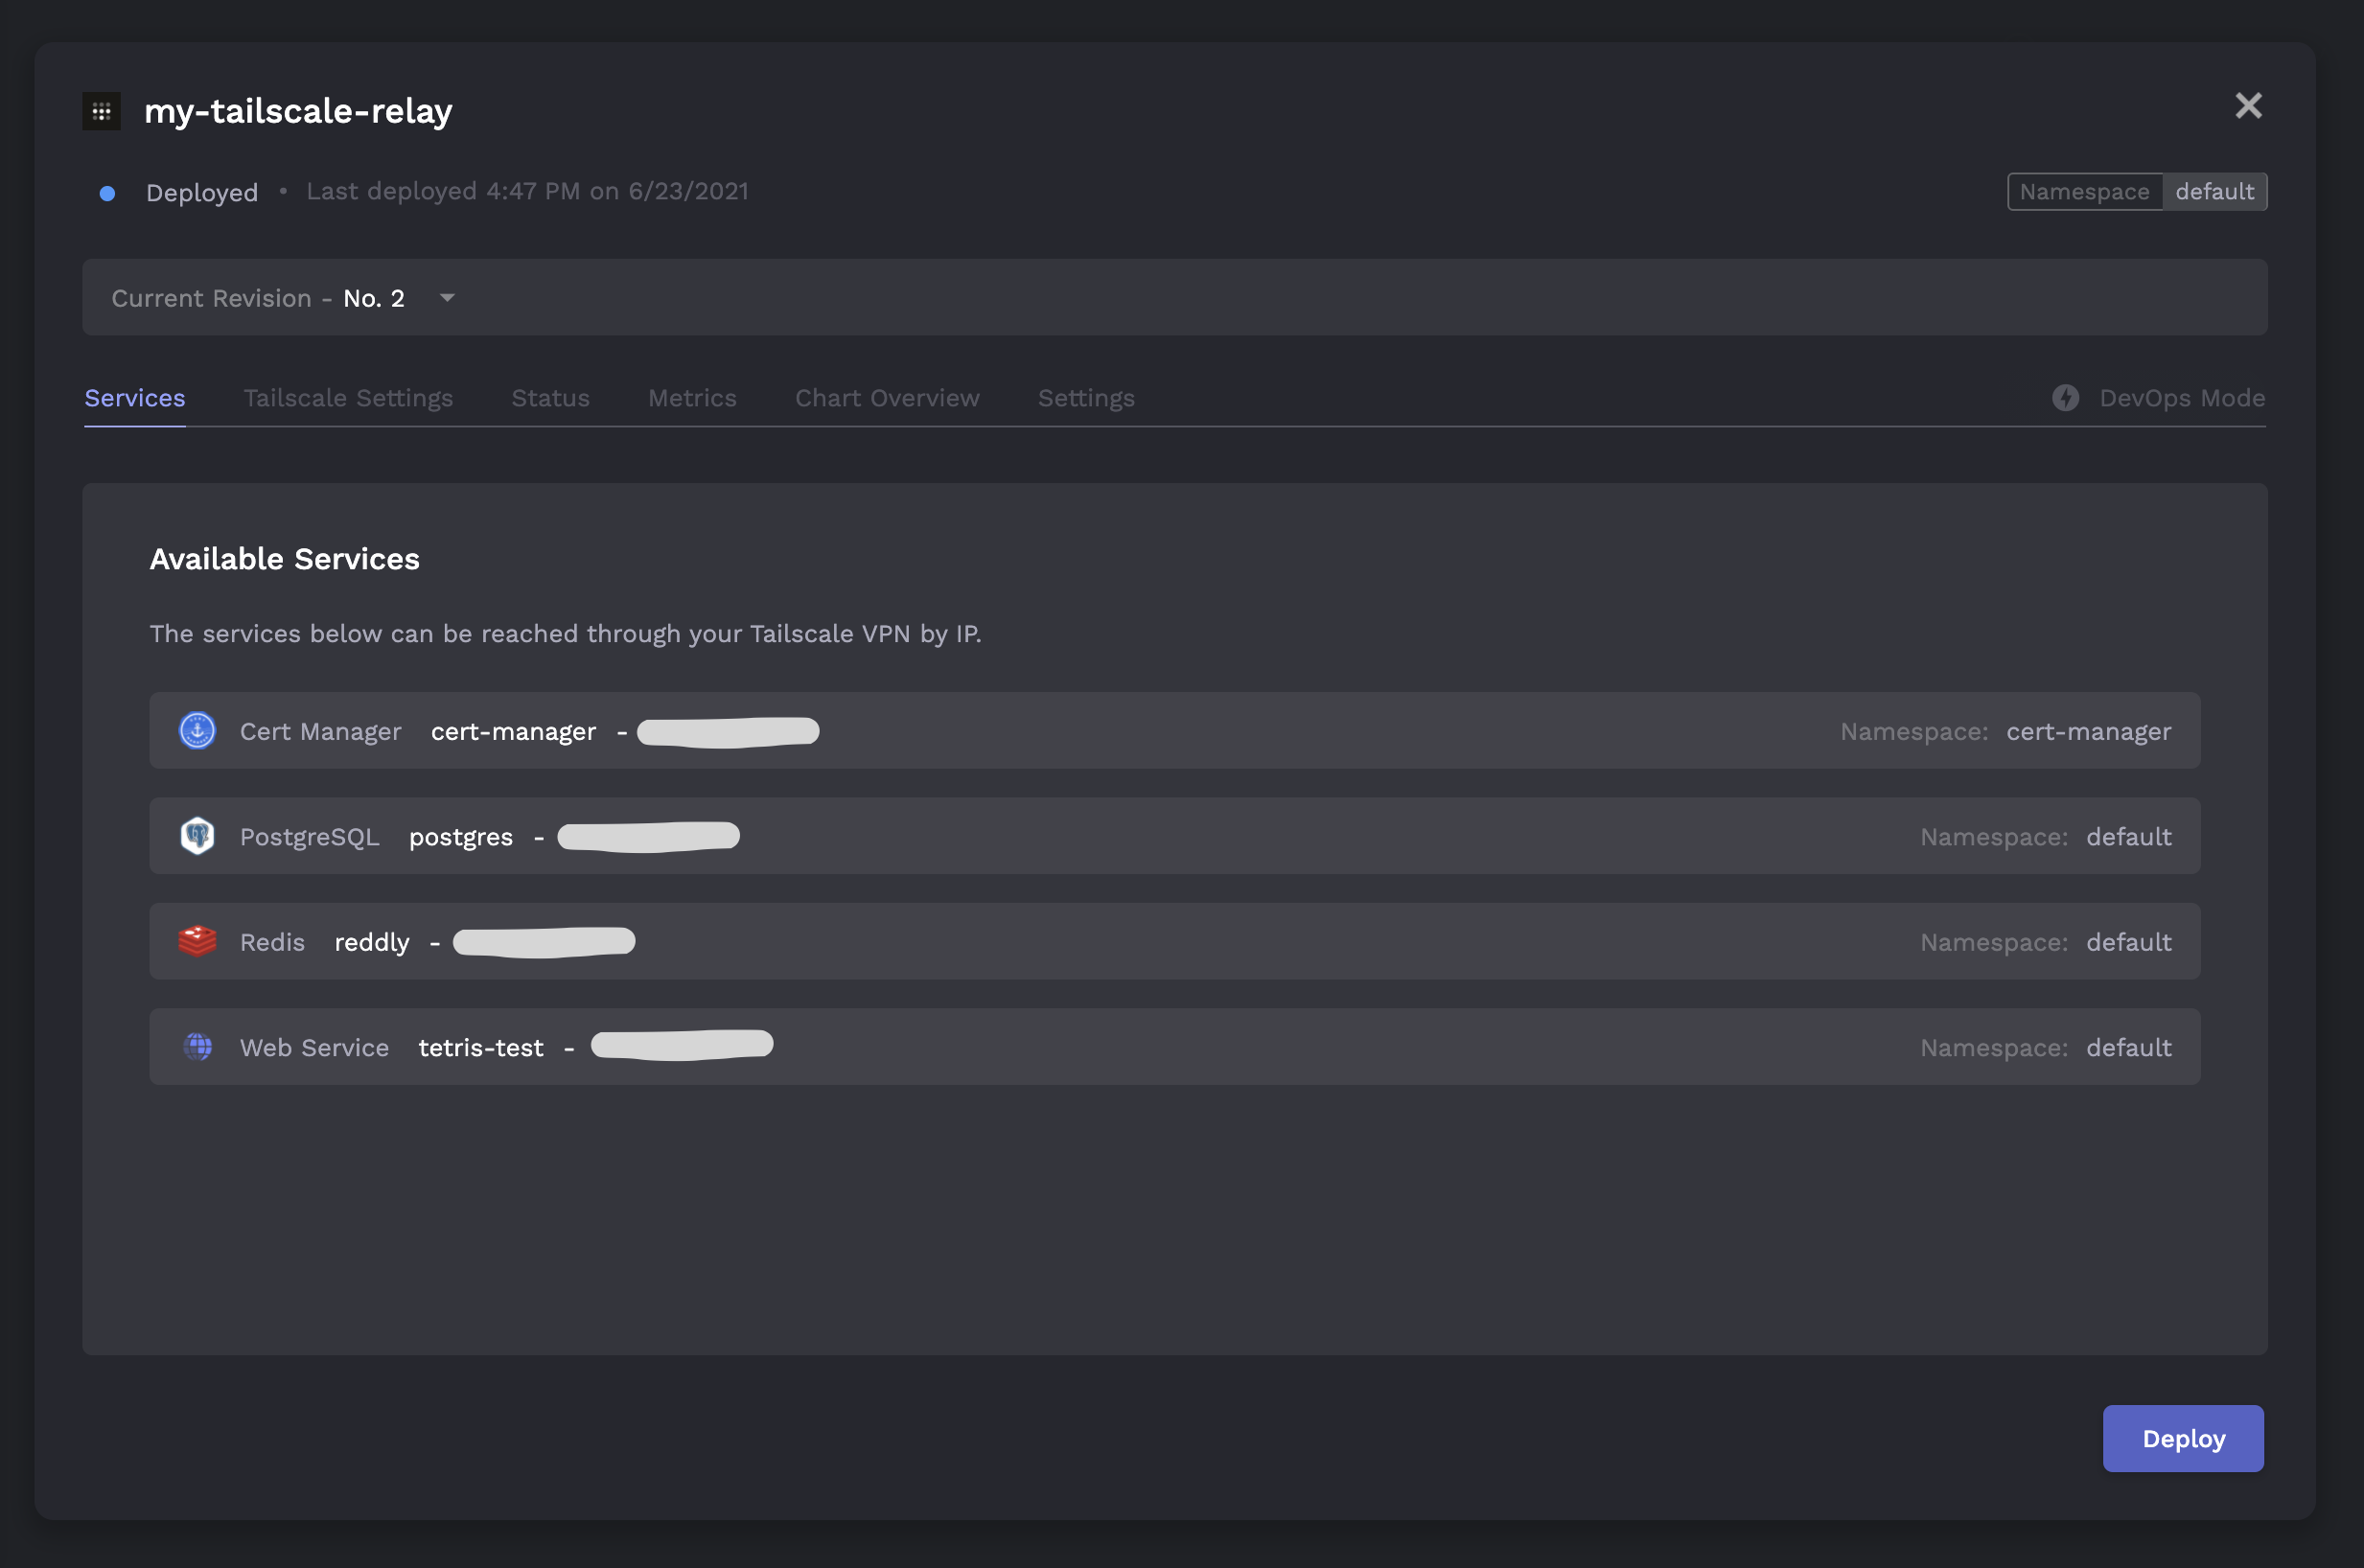
Of course, we can also deploy Tailscale to our cluster directly from the Porter dashboard:
The dashboard will first prompt us to input our Tailscale auth key and subnet range (see steps (1) and (2) above):

Afterwards, we just need to approve our subnet routes from the Tailscale dashboard (see step (4) above) and we're all set!
Testing the Subnet Router
To verify that everything is working as expected, we'll connect to an internal Redis instance running on the cluster from our local machine.
Success! We've set up a Tailscale subnet router on our Kubernetes cluster.
Porter is an open source PaaS that helps teams automate DevOps in their own cloud.
More Blog Posts


Subscribe to our newsletter
