TUTORIAL

Deploy Django on Kubernetes in a few clicks (without even Dockerizing your application)

Trevor Shim
June 7, 2021
4 min read
This blog article is based on the documentation and example repository written by Porter's community member, jimcru21.

Kubernetes is a powerful container orchestrator that automates deployments, management, and scaling of containerized applications. Despite all these benefits of Kubernetes, however, there is typically a ton of overhead to it that is often not justified for simple applications. In this tutorial, we go over how to deploy Django applications on major cloud providers' Kubernetes offerings (e.g. EKS, GKE, DOKS) in a few clicks using Porter, without even having to containerize your applications.

What is Porter?

Porter is a Platform as a Service (PaaS) that runs in the user's own cloud. If you're familiar with Heroku/Vercel/Netlify, Porter brings the ease of use of those platforms into your own cloud, particularly into your own Kubernetes cluster. With Porter, you can deploy and scale Django applications on Kubernetes with minimal overhead without having to write a Dockerfile or YAML files.

Porter is open source. Check out the source code here.

Provisioning the Kubernetes Cluster

Before you can start deploying a Django application on Kubernetes, you must first provision a Kubernetes cluster. With Porter, it's possible to create a cluster on AWS, GCP, and Digital Ocean with a single click. Follow this guide to provision the cluster in the cloud provider of your choice.

Alternatively, you can also provision a cluster on your own and connect Porter to an existing cluster. These are the guides on how to create your own cluster for each cloud provider:

After you've created a Kubernetes cluster, you can connect to it via the Porter CLI per this guide.

Prepare Django Application

While it is not necessary to containerize your Django application to deploy it through Porter, you must follow these steps for a successful deployment.

1. Install django-allow-cidr (this is the middleware to enable the use of CIDR IP ranges in ALLOWED_HOSTS)

pip install django-allow-cidr

2. Go to Django Settings and add os.environ.get in allowed host.

ALLOWED_HOSTS = os.environ.get("DJANGO_ALLOWED_HOSTS", default='127.0.0.1').split(" ")

3. Add allowed CIDR networks. Put CIDR according to the Kubernetes kubelet CIDR. If you've provisioned the cluster through Porter, it is set to 10.99.0.0/16 by default. If you've provisioned the cluster yourself, consult your cloud console to find the CIDR.

ALLOWED_CIDR_NETS = os.environ.get("ALLOWED_CIDR_NETS", default='10.99.0.0/16').split(" ")

4. Add django-allow-cidr middleware to the application.

MIDDLEWARE = [ 'allow_cidr.middleware.AllowCIDRMiddleware', #'django.middleware.security.SecurityMiddleware', ]

5. Add Gunicorn

pip install gunicorn

6. Add static folder and add your HTML and CSS files. Locate static URL settings and add static file dirs below:

STATICFILES_DIRS = ( os.path.join(BASE_DIR, 'static'), ) STATIC_ROOT = os.path.join(BASE_DIR, 'staticfiles')

7. Add a Procfile to your repository. This is an alternative configuration to Dockerfile that uses Cloud Native Buildpacks, which have been popularized by Heroku. Porter uses the Procfile to build your images if a Dockerfile is not present.

web: gunicorn .wsgi -b 0.0.0.0:8989 --timeout 120

8. Lastly, generate a requirements file.

pip freeze > requirements.txt

Sample repository for the above configuration: https://github.com/jimcru21/porter-sample-django-non-docker

Deploy Django on Porter

1. Visit the Porter Dashboard. Click Web Service > Launch Template.

2. Name your application.

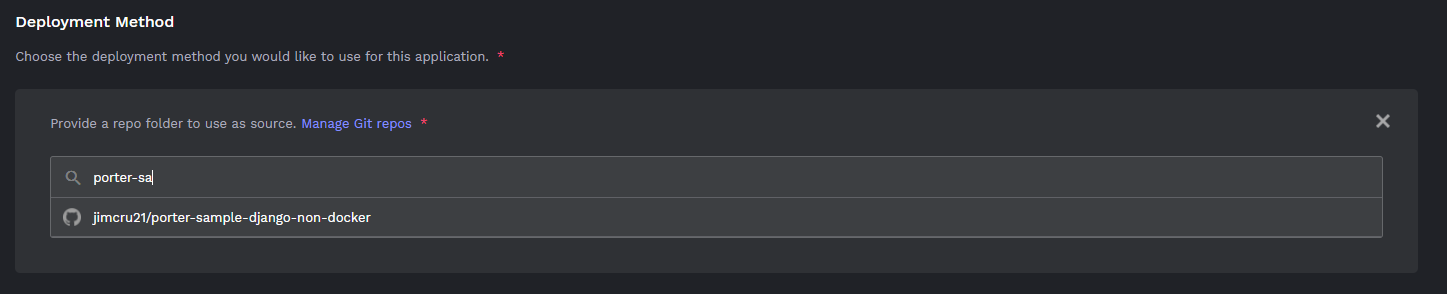
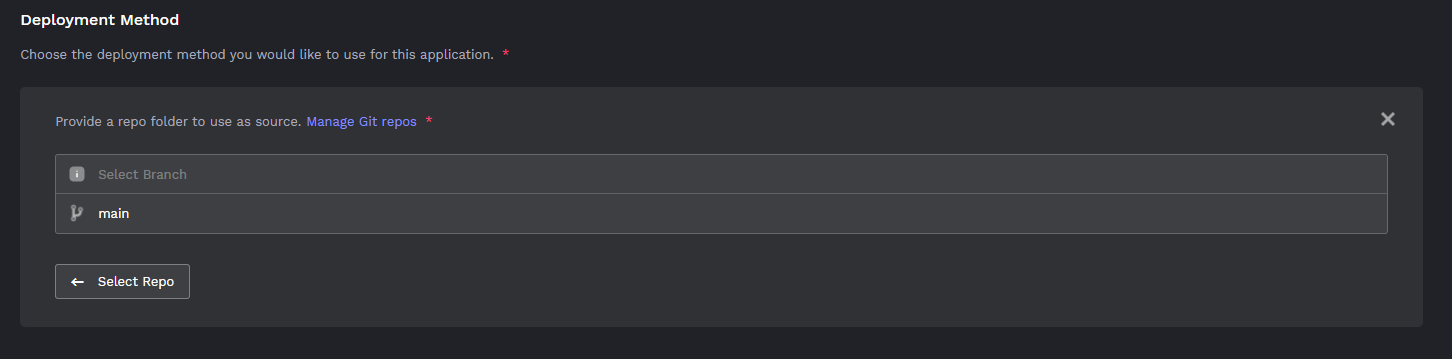
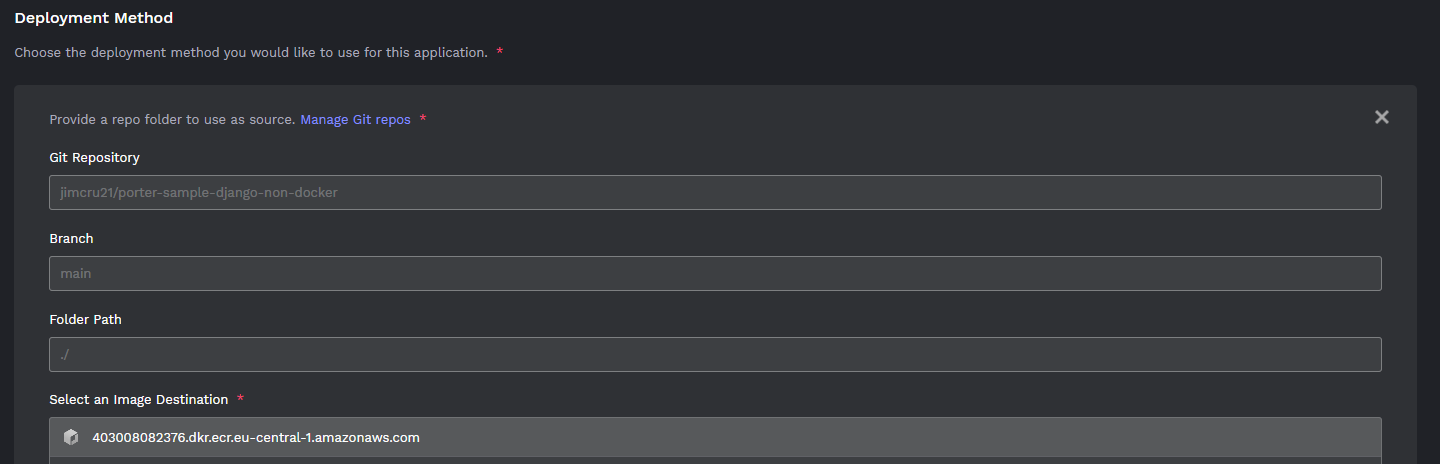
3. When prompted for the deployment method, click Git Repository. Connect your GitHub account and select the repo you'd like to deploy from.

4. Select the branch (main in the example below), then hit Continue.

5. Porter will read your Procfile and prompt you for the name of the process you'd like to run. In the example above, the process is named web. By default, Porter stores your build artifacts in the registry that was provisioned by Porter. If you've connected to an existing cluster, you can also connect an existing container registry to Porter using our CLI per this guide.

6. In Additional settings, specify the container port that you use for gunicorn in the Procfile (in the example above, this is set to 8989). You can also configure custom domain per this guide.

7. From the Environment tab, set DJANGO_ALLOWED_HOSTS that we specify on Django settings. Then input the domain you have set for your application.

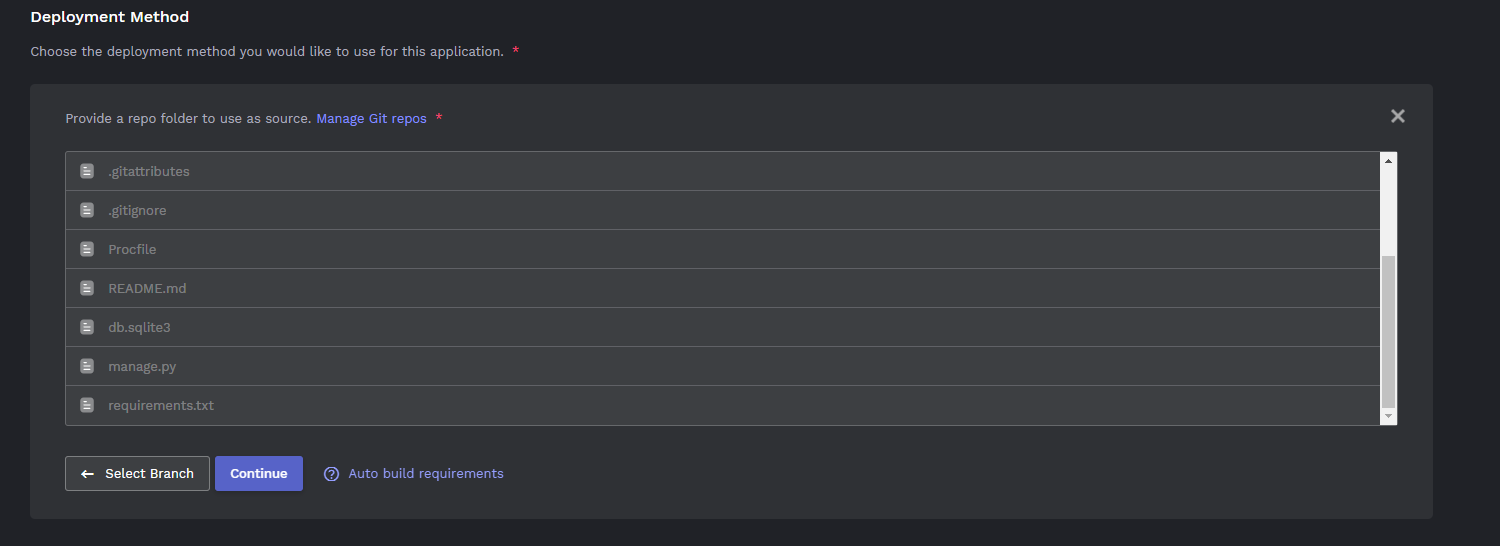
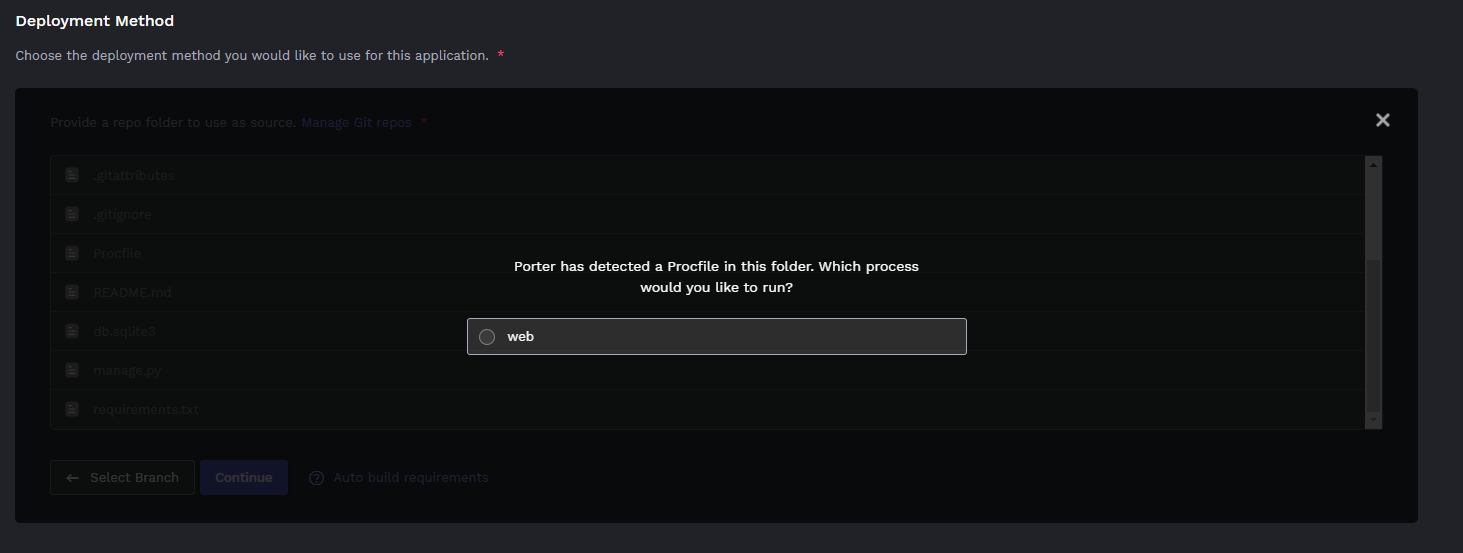
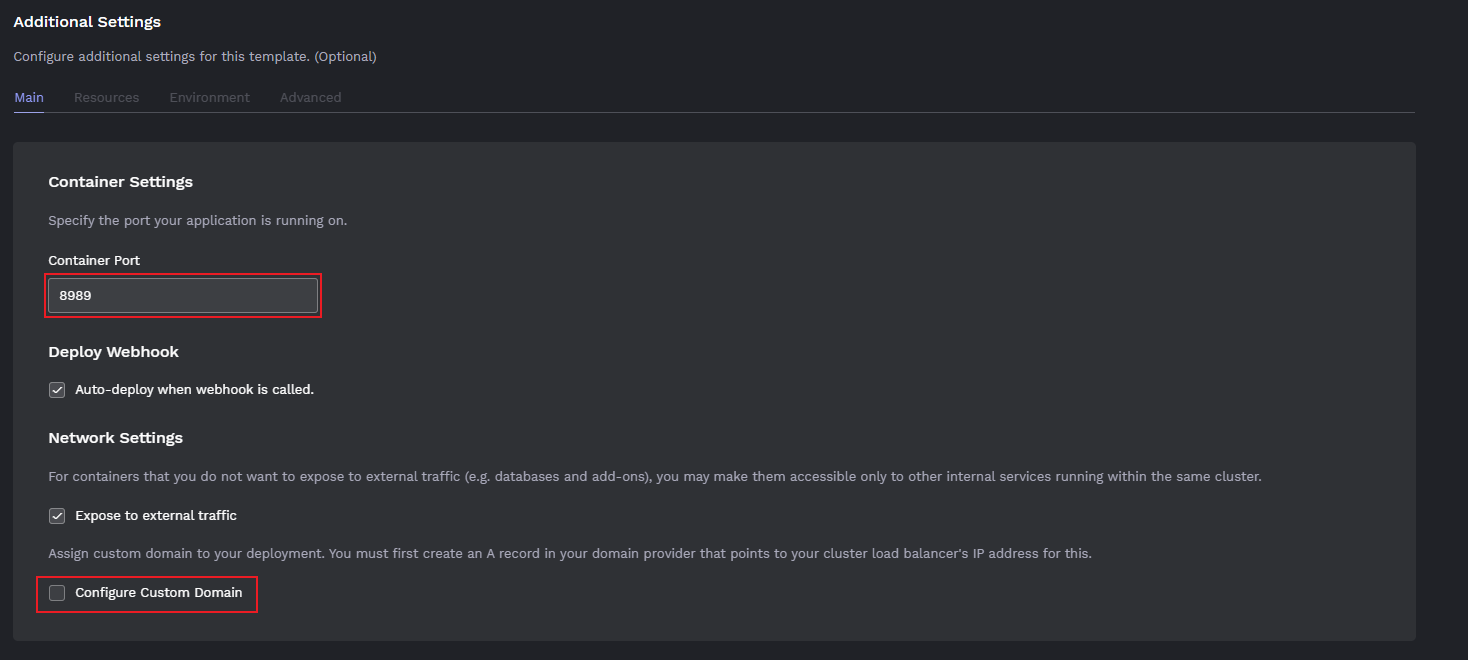
8. Click Deploy then wait for buildpack to finish and push to porter. Porter writes a GitHub Actions file to your repository for Continuous Integration. You can check the build progress on your GitHub repository under the Action tab.
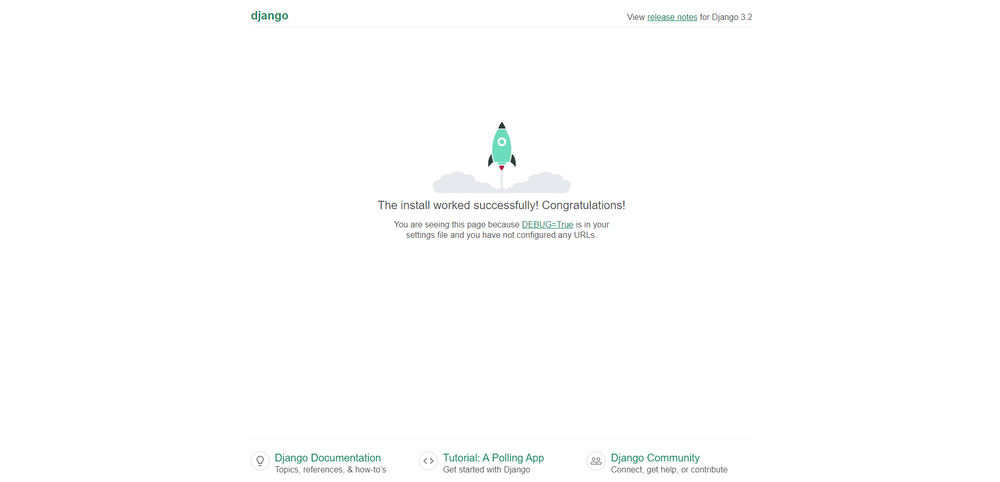
Done!

Kubernetes can be a mountain to climb for newcomers, but developers are drawn to its benefits despite the steep learning curve. Porter is a platform that makes Kubernetes easy to the extent that the user doesn't have to learn anything about Kubernetes, or even Docker, to start deploying.

If you have any questions about this tutorial, join our discord community and ask away!

Next Up

Heroku vs AWS: A comparison
Shankar Radhakrishnan
7 min read
Comparing Elastic Beanstalk and Heroku: which cloud platform is right for you
Shankar Radhakrishnan
4 min read
History of PaaS: How Canon almost became a major cloud provider
Trevor Shim
6 min read
Subscribe to our weekly newsletter
Thank you! Your submission has been received!
Oops! Something went wrong while submitting the form.